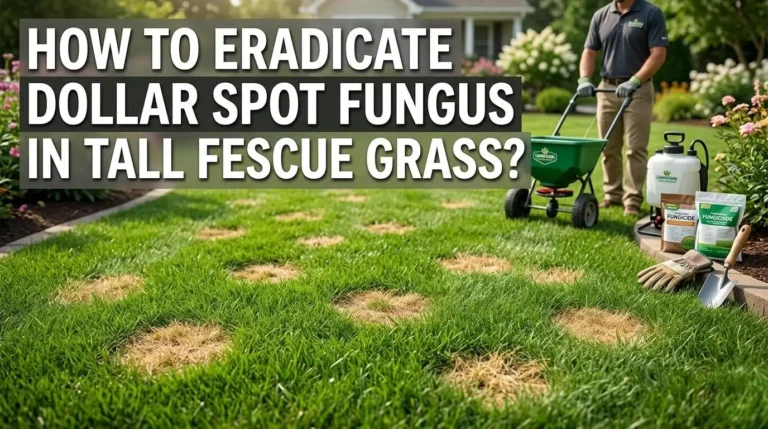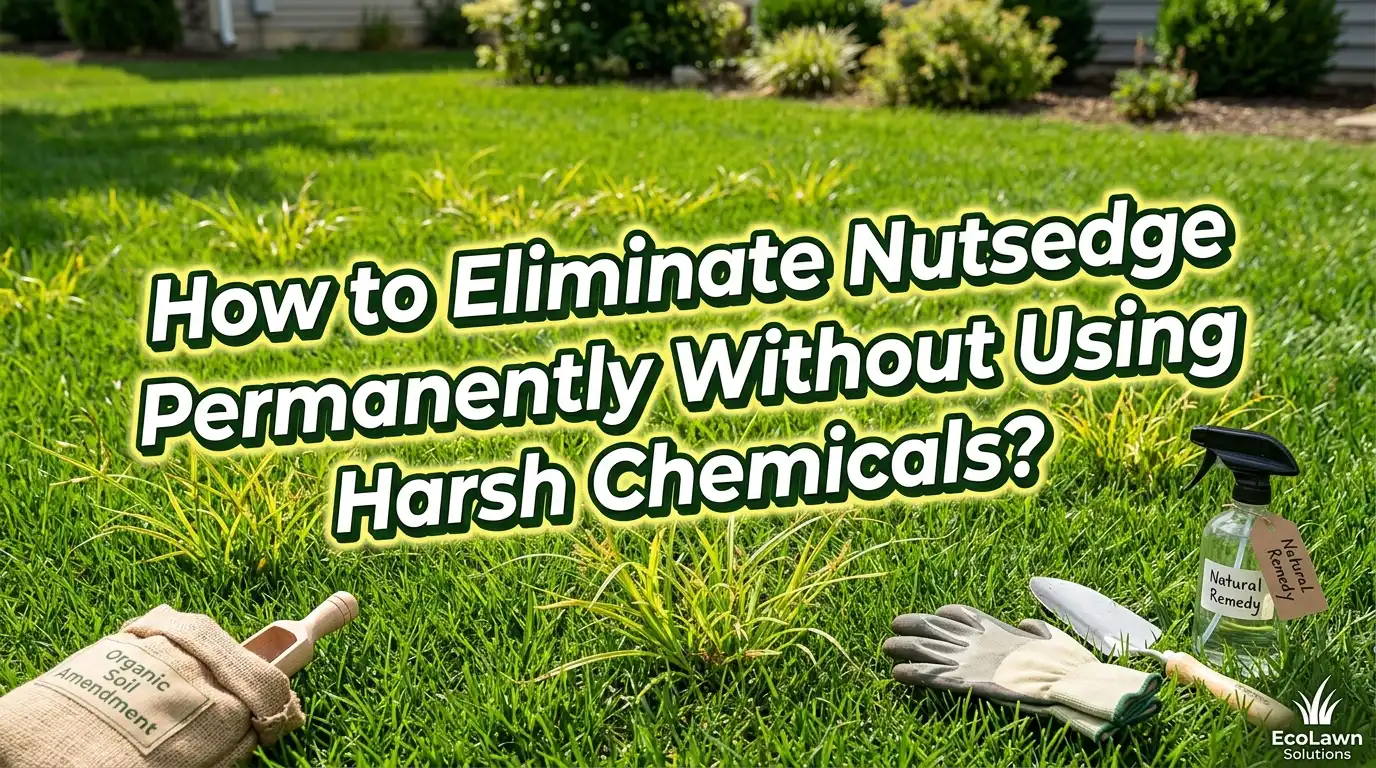
How to Eliminate Nutsedge Permanently Without Using Harsh Chemicals?
Have you noticed a shiny, fast growing weed that towers above your grass just days after mowing? That stubborn invader is called nutsedge, and it is one of the most frustrating weeds a homeowner can face.
Most people reach for chemical herbicides as their first line of defense. But those products can harm beneficial insects, contaminate groundwater, and pose risks to pets and children.
This guide walks you through every proven method for removing nutsedge without a single drop of harsh chemicals. From improving your soil conditions to using household ingredients like vinegar and molasses, you will learn exactly what works and what does not.
In a Nutshell
- Nutsedge is not a grass. It is a perennial sedge with triangular stems and underground tubers (called nutlets) that allow it to survive winter and regrow each spring. Pulling only the top of the plant does almost nothing because the tubers left underground will produce new growth within days.
- Soil conditions are the root cause. Nutsedge thrives in wet, compacted, and poorly drained soil. If you fix the drainage and reduce moisture, you remove the conditions that give nutsedge its competitive advantage over regular lawn grasses.
- Multiple natural methods exist and they work best in combination. Hand pulling, solarization, smothering with cardboard, vinegar sprays, horticultural molasses, and proper lawn care all play a role. No single method will eliminate nutsedge on its own, but stacking two or three methods together produces lasting results.
- Prevention is as important as treatment. A thick, healthy lawn mowed at the correct height (3 to 4 inches) will crowd out nutsedge and stop it from returning. Overseeding thin spots in the fall and aerating compacted soil each year will strengthen your lawn’s natural resistance to weed invasion.
- Patience is essential. Natural nutsedge removal takes time. Expect to invest one to three growing seasons of consistent effort before you see permanent results. The payoff is a safe, chemical free lawn that stays healthy for years.
What Exactly Is Nutsedge and Why Is It So Hard to Kill
Nutsedge belongs to the Cyperus genus. It is a sedge, not a grass, and its triangular stem is the easiest way to identify it. The popular saying among gardeners is “sedges have edges,” because you can feel the three sharp edges of the stem between your fingers. Nutsedge leaves are glossy, stiff, and grow faster than surrounding grass.
The real challenge with nutsedge is underground. Each plant produces tubers (also called nutlets) at the tips of underground stems called rhizomes. These tubers can survive freezing winters and drought. A single nutsedge plant can produce hundreds of tubers in one season. Even if you kill every leaf above the soil, the tubers remain dormant and sprout new plants the following spring.
There are two main types. Yellow nutsedge (Cyperus esculentus) has bright green leaves and yellowish seed heads. Purple nutsedge (Cyperus rotundus) has darker seed heads and is considered more aggressive. Both types spread through tubers rather than seeds, which is why traditional weed prevention methods like pre emergent herbicides have limited effect.
This underground survival system is what makes nutsedge different from ordinary weeds. To eliminate it permanently, you must either remove the tubers physically, exhaust their energy reserves, or change the soil environment so they cannot thrive.
Why Nutsedge Loves Your Lawn: Understanding the Root Cause
Before you attack nutsedge directly, it helps to understand why it chose your lawn in the first place. Nutsedge is an indicator plant. Its presence tells you something about your soil conditions.
Nutsedge thrives in wet, compacted, and poorly drained soils. If water pools on your lawn after rain or irrigation, you have created the perfect habitat for this weed. Compacted soil prevents water from draining quickly, and nutsedge takes full advantage of that lingering moisture. Overwatering your lawn is one of the most common reasons nutsedge shows up.
Low spots in your yard are especially vulnerable. These areas collect runoff and stay saturated longer than the rest of the lawn. Nutsedge will almost always appear in these wet zones first and then spread outward as tubers multiply underground.
Thin or stressed grass also invites nutsedge. When your lawn is mowed too short, has bare patches, or lacks nutrients, it cannot compete with aggressive weeds. Nutsedge fills the gaps quickly and establishes a foothold that becomes harder to remove over time.
Understanding this root cause is critical because treating the weed without fixing the soil is like mopping the floor while the faucet is still running. Every permanent nutsedge removal plan must start with soil and drainage improvement.
How to Improve Soil Drainage to Discourage Nutsedge Growth
Fixing your soil drainage is the single most impactful step you can take. Once you remove the wet conditions nutsedge prefers, your lawn grass gains the competitive advantage.
Aerate your lawn at least once a year. Core aeration punches small holes into compacted soil, allowing air, water, and nutrients to reach grass roots more efficiently. This reduces surface pooling and creates drier conditions that nutsedge dislikes. Fall is the best time to aerate cool season grasses, while late spring works best for warm season varieties.
Add organic matter like compost to improve soil structure. Spread a thin layer (about a quarter inch) of compost over your lawn after aeration. Compost helps break up clay heavy soil and improves both drainage and water retention in sandy soil. Over time, this creates a healthier environment for grass and a less favorable one for nutsedge.
Install drainage solutions for chronic wet spots. French drains, dry creek beds, or simple regrading can redirect water away from low lying areas. If a certain section of your yard stays wet for days after rain, drainage work may be the only way to stop nutsedge from returning to that spot.
Pros: Addresses the root cause of nutsedge growth, benefits your entire lawn and garden, and produces long lasting results.
Cons: Requires upfront labor and possibly some investment for drainage installations, and results take weeks to months to become visible.
Hand Pulling Nutsedge the Right Way
Hand pulling can work, but only if you do it correctly. Most people make the mistake of simply yanking the visible plant from the surface. This snaps the stem and leaves the tubers and rhizomes in the soil, which will produce new growth within a week.
Pull nutsedge in early spring when plants are young and small. At this stage, tubers are closer to the surface and have not yet produced new nutlets. Water the soil thoroughly before pulling so it is soft and loose. Use a narrow trowel or garden fork to dig around each plant, going at least 8 to 10 inches deep. Gently lift the entire root system, including the small, hard tuber at the bottom.
Check the soil carefully after each pull. Even a single leftover tuber can restart the infestation. Place all pulled plants and tubers in a sealed bag and dispose of them in the trash. Do not compost nutsedge because tubers can survive the composting process and spread when you apply the finished compost.
Repeat this process every one to two weeks throughout the growing season. Consistent pulling exhausts the energy reserves stored in any tubers you missed. Over time, the population will decline noticeably.
Pros: No cost, no chemicals, and very targeted so you avoid harming other plants.
Cons: Labor intensive, time consuming, and not practical for large infestations. Missed tubers will regrow quickly.
Solarization: Using the Sun to Cook Nutsedge Out of Your Soil
Soil solarization is a powerful method that uses trapped solar heat to kill nutsedge tubers, seeds, and other weed roots in the top layers of soil. It works best during the hottest months of the year, typically June through August.
Start by mowing the infested area as short as possible and removing all debris. Water the soil deeply so it is thoroughly moist. Moisture conducts heat more effectively into the ground, which is essential for reaching tubers buried several inches below the surface.
Cover the entire infested area with clear plastic sheeting (not black). Clear plastic allows sunlight to pass through and creates a greenhouse effect that heats the soil to temperatures between 110°F and 140°F. Anchor the edges of the plastic with rocks, bricks, or buried soil to seal in the heat. Leave the plastic in place for four to six weeks without disturbing it.
After removing the plastic, inspect the treated area. Most nutsedge plants and tubers within the top 6 inches of soil will be dead. Deeper tubers may survive, so monitor the area and hand pull any new sprouts that appear.
Pros: Highly effective at killing tubers near the surface, chemical free, and also eliminates other weed seeds and some soil borne pathogens.
Cons: Takes the treated area out of use for over a month, only works during hot sunny weather, may not kill tubers deeper than 6 inches, and can also kill beneficial soil organisms.
Smothering Nutsedge With Cardboard and Mulch
Smothering works by blocking all sunlight from reaching nutsedge plants. Without light, the plants cannot photosynthesize and will eventually exhaust the energy stored in their tubers. This method is especially effective in garden beds and landscape areas.
First, mow or cut the nutsedge as close to the ground as possible. Lay several layers of thick cardboard or at least 10 sheets of newspaper directly over the infested area. Overlap the edges by at least 6 inches so no light can sneak through the gaps.
Wet the cardboard thoroughly to help it stay flat against the soil. Then cover it with 3 to 4 inches of organic mulch such as wood chips, shredded bark, or straw. The mulch holds the cardboard in place, blocks additional light, and gives the area a finished appearance.
Leave this barrier in place for at least 8 to 12 weeks. The nutsedge will exhaust its energy reserves trying to push through the barrier and will die. Over time, the cardboard decomposes and adds organic matter to the soil.
This technique is sometimes called sheet mulching and is a favorite among organic gardeners. It works well for reclaiming garden beds, creating new planting areas, or clearing patches of nutsedge along walkways and fences.
Pros: Inexpensive, uses recyclable materials, improves soil over time, and requires very little maintenance once installed.
Cons: Slow process, not suitable for active lawn areas you want to keep green, and very aggressive nutsedge may occasionally push through thin spots.
Vinegar as a Natural Nutsedge Killer
Vinegar is a popular organic option for spot treating nutsedge. The acetic acid in vinegar draws moisture out of plant cells and causes the foliage to dry out and die. However, the type of vinegar you use matters a great deal.
Regular household vinegar contains about 5% acetic acid, which is too weak to kill nutsedge effectively. You need horticultural vinegar with a concentration of 15% to 20% acetic acid for reliable results. This stronger solution burns the leaves on contact and can damage the plant enough to weaken it significantly.
Apply vinegar directly to the nutsedge leaves on a hot, sunny day for maximum effectiveness. Use a spray bottle or pump sprayer and target only the nutsedge to avoid damaging nearby plants. Vinegar is a nonselective herbicide, meaning it will kill any plant it touches.
Be aware that vinegar kills the foliage but does not reach the tubers underground. You will likely need multiple applications spaced one to two weeks apart to exhaust the plant’s energy reserves. Combining vinegar treatments with hand pulling or smothering improves your overall results.
Pros: Readily available, inexpensive, breaks down quickly in the soil, and safe for use around pets and children when dry.
Cons: Does not kill tubers, requires repeated applications, can harm desirable plants, and strong concentrations can irritate skin and eyes during application.
Horticultural Molasses: Feeding the Soil to Starve Nutsedge
This method takes an indirect approach. Instead of attacking nutsedge directly, you feed the beneficial microorganisms in your soil that naturally break down organic matter, including nutsedge tubers.
Horticultural molasses is a liquid sugar product that acts as a food source for bacteria and fungi already living in your soil. When these microorganisms become more active, they decompose the nutlets (tubers) and weaken the nutsedge from below ground. At the same time, healthier microbial activity improves soil structure, which benefits your lawn grass.
To apply, mix 1 to 2 tablespoons of horticultural molasses per gallon of water and drench the infested area. Apply every two to three weeks during the growing season. Some gardeners also use dry molasses sprinkled directly on the soil at a rate of about 10 pounds per 1,000 square feet.
Results from molasses are gradual, not instant. You may not see a significant reduction in nutsedge until the second or third growing season. However, this method builds long term soil health and creates conditions that discourage nutsedge from returning.
Pros: Improves overall soil biology, safe for all plants and animals, and supports long term weed prevention.
Cons: Slow to show visible results, requires consistent application over multiple seasons, and will not eliminate a severe infestation on its own.
Corn Gluten Meal as a Pre Emergent Nutsedge Barrier
Corn gluten meal is a natural byproduct of corn processing that inhibits root formation in germinating seeds. It does not kill established plants, but it prevents new nutsedge seedlings and some tuber sprouts from establishing strong root systems.
Apply corn gluten meal in early spring before nutsedge begins to emerge, typically when soil temperatures reach about 55°F to 60°F. Spread it evenly at a rate of 20 pounds per 1,000 square feet. Water it in lightly and then allow the soil surface to dry. The drying phase is important because corn gluten meal needs a dry period to activate its root inhibiting properties.
Keep in mind that corn gluten meal also acts as a natural fertilizer, adding nitrogen to the soil at roughly 10% by weight. This feeds your lawn grass and helps it grow thicker, which further discourages nutsedge.
Corn gluten meal works best as part of a multi method approach. Use it alongside hand pulling, drainage improvement, and proper mowing height for the best chance of permanent nutsedge control.
Pros: Completely natural, doubles as a fertilizer, safe for pets and children, and prevents new weed growth.
Cons: Has no effect on established nutsedge plants, timing is critical, and effectiveness drops significantly if the soil stays too wet after application.
Boiling Water Treatment for Small Nutsedge Patches
For isolated patches of nutsedge growing in driveways, sidewalk cracks, or edges of garden beds, boiling water is a simple and immediately effective treatment. The extreme heat destroys plant cells on contact, killing both the foliage and the shallow roots.
Boil a large pot of water and carefully carry it to the nutsedge patch. Pour the water slowly and directly over the base of each plant, saturating the root zone. The heat penetrates a few inches into the soil and can damage or kill shallow tubers.
This method works best on small, isolated patches where you can apply the water without risking damage to nearby plants. Boiling water is nonselective and will kill any vegetation it touches, so precision is essential.
You may need to repeat the treatment two or three times over the course of a few weeks to catch any tubers that survived the initial application. Always exercise caution when handling boiling water outdoors to avoid burns.
Pros: Free, chemical free, instantly kills foliage, and requires no special equipment.
Cons: Only practical for very small areas, can damage desirable plants nearby, does not reliably reach deep tubers, and carries a risk of personal injury from handling boiling water.
Essential Oils as a Natural Herbicide Option
Certain essential oils, especially clove oil and cinnamon oil, contain compounds that damage plant cell walls and cause rapid drying of the foliage. These oils can be used as a natural contact herbicide against nutsedge.
Mix clove oil or cinnamon oil with water and a small amount of liquid dish soap (which acts as a surfactant to help the mixture stick to the leaves). Spray the solution directly onto nutsedge foliage, making sure to coat the leaves thoroughly. Apply during warm, dry weather for the strongest results.
Essential oils work similarly to vinegar in that they burn the above ground portions of the plant but do not penetrate to the tubers. Repeated applications every one to two weeks are needed to wear down the plant’s energy reserves. Combining essential oil sprays with hand pulling gives you a better chance of long term success.
Pros: Pleasant smell, safe for use around pets and children after drying, biodegradable, and available at most stores.
Cons: Does not kill tubers, requires multiple applications, can be more expensive than vinegar, and will harm any plant it contacts.
Proper Lawn Care: Your Best Long Term Defense Against Nutsedge
A thick, healthy, well maintained lawn is the single best long term defense against nutsedge and virtually every other weed. When grass is dense and vigorous, there is simply no room for nutsedge to gain a foothold.
Mow your grass at the correct height. For most grass types, this means 3 to 4 inches tall. Taller grass shades the soil surface, which reduces the light that nutsedge seeds and tubers need to sprout. Never remove more than one third of the grass blade in a single mowing. Scalping your lawn weakens the grass and opens the door to weed invasion.
Water deeply but less often. Train your grass roots to grow deep by watering about 1 inch per week in one or two sessions rather than light daily watering. Deep rooted grass is healthier and more competitive, while shallow watering encourages nutsedge.
Overseed bare or thin spots in the fall. Nutsedge exploits any gap in your lawn’s coverage. Fill those gaps with quality grass seed before nutsedge gets the chance. Fall overseeding gives grass time to establish strong roots before the following summer’s nutsedge season.
Fertilize your lawn appropriately based on a soil test. Balanced nutrition keeps grass growing vigorously without creating conditions that favor weeds.
Building a Multi Method Nutsedge Elimination Plan
No single natural method will permanently eliminate nutsedge on its own. The most successful approach combines several methods simultaneously and requires patience over one to three growing seasons.
Start by addressing the root cause: improve soil drainage and fix overwatering habits. This step alone can reduce nutsedge populations by 50% or more over two seasons.
Next, actively remove existing plants using hand pulling (for small infestations) or solarization and smothering (for larger areas). Target nutsedge early in the growing season before it has time to produce new tubers.
Support these efforts with organic treatments like horticultural molasses to weaken tubers underground and corn gluten meal to prevent new growth. Use vinegar or essential oil sprays as spot treatments for any plants that escape your primary methods.
Finally, strengthen your lawn through proper mowing, deep watering, overseeding, and annual aeration. A competitive lawn is your best long term insurance policy against nutsedge returning.
Track your progress each season. You should see fewer nutsedge plants each year as you deplete the tuber bank in your soil. Stay consistent and do not skip treatments, especially during the critical spring and early summer period when nutsedge emerges.
Common Mistakes That Let Nutsedge Come Back
Many homeowners get frustrated with nutsedge because they unknowingly make mistakes that allow it to return year after year. Avoiding these errors will save you time and effort.
Pulling without removing the tubers is the most common mistake. If you simply yank the green top off a nutsedge plant, the tuber remains underground and sends up a new shoot within days. Always dig deep and remove the entire root system.
Overwatering the lawn creates the exact conditions nutsedge needs. Many irrigation systems are set to water too frequently, keeping the soil surface consistently wet. Adjust your schedule to allow the top inch of soil to dry between waterings.
Mowing too short stresses your grass and gives nutsedge a competitive advantage. Keep your mower blade at the highest recommended setting for your grass type.
Giving up too soon is another major pitfall. Natural methods require consistent effort over multiple seasons. The tuber bank in your soil took years to build up, and it will take time to deplete. Stay committed to your plan and you will see steady improvement.
Composting pulled nutsedge can reintroduce tubers into your garden. Always bag and dispose of nutsedge in the regular trash, never in your compost pile.
Frequently Asked Questions
Can I kill nutsedge permanently with just vinegar?
Vinegar can kill the above ground foliage of nutsedge, but it does not reach or destroy the underground tubers. This means the plant will regrow after each application. Vinegar works best as a spot treatment used alongside other methods like hand pulling and drainage improvement. For permanent results, you need to combine vinegar sprays with techniques that address the tubers directly.
How deep do nutsedge tubers grow in the soil?
Nutsedge tubers can be found 8 to 14 inches below the soil surface, although most are concentrated in the top 6 to 10 inches. When hand pulling or digging, you should go at least 8 to 10 inches deep and work about 10 inches beyond the visible perimeter of the plant to capture connected tubers.
Is nutsedge harmful to other plants in my garden?
Nutsedge is not toxic to other plants, but it is extremely competitive. It aggressively takes water, nutrients, and sunlight away from surrounding plants. In garden beds, it can weaken vegetables, flowers, and ornamental plants by outcompeting them for essential resources. Removing it protects the health and productivity of your desired plants.
How long does solarization take to kill nutsedge?
Soil solarization typically requires four to six weeks of continuous coverage during the hottest part of summer. Clear plastic works better than black plastic for generating maximum heat. Soil temperatures must reach at least 110°F to 140°F consistently to kill tubers in the top few inches. Deeper tubers may survive, so follow up with hand pulling if you see any regrowth.
Will nutsedge spread to my neighbor’s yard?
Yes, nutsedge can spread to adjacent properties through its underground rhizome network. Tubers and rhizomes can extend several feet from the parent plant. If your nutsedge grows near property borders, it is possible for new plants to emerge on the other side. Treating the infestation promptly helps prevent it from becoming a neighborhood problem.
What time of year is best for removing nutsedge naturally?
Early spring through early summer is the ideal window for nutsedge removal. At this stage, plants are young, tubers are closer to the surface, and new nutlets have not yet formed. Acting early prevents the plant from reproducing and building up its underground tuber reserves for the following year.
Hi, I’m Jane! As a passionate gardener and product enthusiast, I spend my days testing garden tools, comparing products, and writing honest reviews so you don’t have to learn the hard way. Got a question? Feel free to reach out — I’d love to hear from you!