How to Fix Brown Patches in Bermuda Grass Quickly?
You spent months building the perfect Bermuda grass lawn. Then one morning, you walk outside and see ugly brown patches scattered across your yard.
It feels like all your hard work just vanished overnight. But here is the good news: brown patches in Bermuda grass are fixable, and most of the time, you can restore your lawn faster than you think.
Brown patches can pop up for many reasons. Fungal infections, poor watering habits, soil compaction, pest damage, and even pet urine can turn your green carpet into a patchy mess.
This guide walks you through every common cause of brown patches in Bermuda grass. You will learn how to diagnose the problem, apply targeted solutions, and prevent those patches from coming back.
In a Nutshell
- Brown patches in Bermuda grass usually come from one of five causes: fungal disease, improper watering, soil compaction, pest damage, or nutrient deficiencies. Identifying the right cause is the most important first step before applying any treatment.
- Fungal infections like brown patch disease create circular dead spots with a distinctive “smoke ring” border. These patches spread fast in warm, humid conditions, especially when grass stays wet overnight. Fungicide applications and watering adjustments can stop the spread within days.
- Overwatering is one of the most common and overlooked causes. Bermuda grass prefers deep, infrequent watering. Soggy soil suffocates roots and invites fungal growth. Adjusting your irrigation schedule alone can fix many brown patch problems.
- Soil aeration and proper fertilization speed up recovery significantly. Compacted soil blocks water and nutrients from reaching roots. Core aeration opens the soil and allows your Bermuda grass to heal and spread into damaged areas.
- Most brown patches in Bermuda grass recover within two to four weeks with proper treatment. Severe cases involving dead roots may take six to eight weeks. Early action is always the fastest path to a green lawn again.
- Prevention is easier than treatment. Regular mowing at the correct height, balanced fertilization, morning watering, and seasonal aeration will keep brown patches from returning year after year.
What Causes Brown Patches in Bermuda Grass
Brown patches in Bermuda grass develop for several distinct reasons. The most common cause is brown patch disease, a fungal infection caused by Rhizoctonia solani. This fungus thrives in warm, humid weather, especially when nighttime temperatures stay above 60°F and the grass remains wet for long periods.
Overwatering and underwatering both stress Bermuda grass and cause browning. Too much water drowns the roots and creates conditions perfect for fungal growth. Too little water forces the grass into dormancy, turning it brown and crispy.
Soil problems also play a major role. Compacted soil prevents roots from absorbing water and nutrients. Clay soils are especially prone to compaction, and Bermuda grass lawns that receive heavy foot traffic often develop brown patches in high traffic areas.
Pest damage is another frequent culprit. Grubs feed on grass roots beneath the soil surface. When grubs eat enough roots, the grass above dies and turns brown. Chinch bugs are another pest that sucks moisture from grass blades, leaving behind dry, brown patches.
Finally, chemical burns from fertilizer spills, pet urine, or gasoline can kill grass in specific spots. These patches usually have clearly defined edges and appear suddenly rather than spreading gradually.
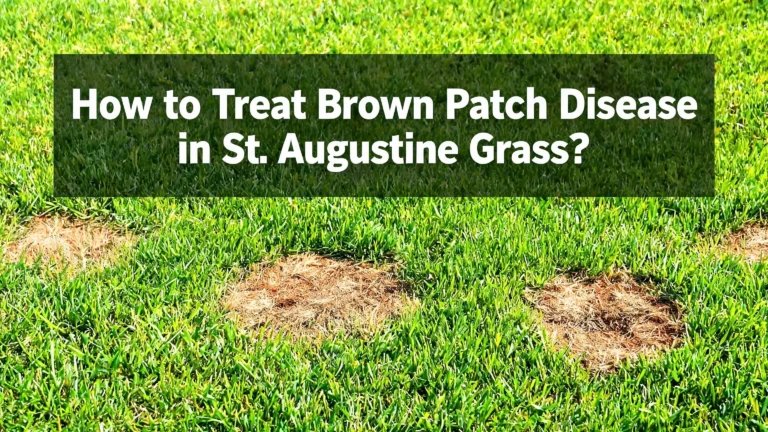
How to Identify Brown Patch Fungus in Your Lawn
Brown patch fungus has a very specific appearance that sets it apart from other causes. Look for circular or irregular patches of brown grass ranging from a few inches to several feet across. The patches often appear overnight or within just a few days.
The most reliable sign of brown patch fungus is the “smoke ring” border. This is a thin, dark gray or brown ring around the outer edge of the patch. The smoke ring is most visible in the early morning when dew is still on the grass. It marks the active edge where the fungus is currently spreading.
Pull up a blade of grass from the edge of the patch and inspect it closely. Fungus infected blades show brown lesions with dark borders on the leaf. The blades may look water soaked or slimy at the base. Healthy grass pulled from nearby areas will look clean and firm by comparison.
Pros of visual identification: Free, quick, and often accurate for experienced lawn owners.
Cons of visual identification: Easy to confuse with drought stress or pest damage if the smoke ring is not visible.
If you are not confident in your diagnosis, take a soil and grass sample to your local agricultural extension office. They can confirm the presence of fungal pathogens and recommend the right treatment for your specific situation.
How to Tell the Difference Between Fungus and Grub Damage
Fungus and grub damage can look very similar on the surface. Both create brown, dead looking patches. However, the underlying cause is completely different, and using the wrong treatment wastes time and money.
Here is a simple test for grub damage. Grab a handful of brown grass and pull upward. If the turf lifts easily like a loose carpet, grubs have eaten the roots underneath. Healthy grass or fungus damaged grass will resist pulling because the roots are still intact.
Dig into the soil beneath a brown patch. If you find white, C shaped larvae about half an inch to one inch long, you have a grub problem. Finding more than five grubs per square foot usually means the infestation is severe enough to cause visible damage.
Fungal patches behave differently. They spread outward in circular patterns and show the smoke ring border described above. Fungal damage affects the blades and crowns of the grass but usually leaves the root system partly intact. The grass feels mushy rather than loose.
Pros of the tug test: Takes 30 seconds and gives a clear answer.
Cons of the tug test: Does not work well in very dry conditions when all grass pulls up easily.
Timing also offers clues. Grub damage typically appears in late summer and early fall when larvae are actively feeding. Brown patch fungus is most active during warm, humid periods in spring and fall when temperatures swing between warm days and cool nights.
How to Fix Brown Patch Fungus Quickly
Once you confirm fungal disease, take action immediately to stop the spread. The first step is to stop watering in the evening. Fungus needs prolonged moisture on grass blades to grow. Switch all watering to early morning, ideally before 10 AM, so the grass dries quickly in the sun.
Apply a fungicide containing azoxystrobin, propiconazole, or myclobutanil to the affected areas. Follow the label instructions carefully for application rates and timing. Most fungicides need a repeat application every 14 to 21 days until the disease stops spreading.
Reduce nitrogen fertilizer applications while the disease is active. Nitrogen promotes lush, soft growth that the fungus feeds on. Let your lawn rest until the fungal infection is under control.
Pros of fungicide treatment: Stops disease spread within days and prevents further damage.
Cons of fungicide treatment: Costs money, requires repeat applications, and does not reverse damage already done.
Mow the affected area last to avoid spreading fungal spores to healthy parts of your lawn. Clean your mower blades with a diluted bleach solution after each use during an active outbreak. Bag your clippings rather than mulching them back into the lawn.
Improve air circulation by trimming back overhanging branches and shrubs near the affected area. Better airflow helps grass blades dry faster and creates conditions less friendly to fungal growth. Most lawns begin showing signs of recovery within two to three weeks after treatment begins.
How to Fix Brown Patches Caused by Overwatering
Overwatering is one of the easiest problems to fix, but it requires patience and discipline. Bermuda grass needs about one inch of water per week, including rainfall. Many homeowners water far more than this without realizing it.
Check your soil moisture before turning on the sprinklers. Push a screwdriver into the ground near a brown patch. If it slides in easily, the soil still has plenty of moisture. If the soil is hard and resistant, it needs water. This simple test prevents unnecessary watering.
Switch to a deep, infrequent watering schedule. Water your lawn two to three times per week with longer run times instead of short daily sessions. Deep watering encourages roots to grow deeper into the soil, making the grass more drought resistant and less prone to disease.
Pros of reducing watering: Free, immediately reduces fungal risk, and saves water.
Cons of reducing watering: Takes two to three weeks to see full results and requires breaking old habits.
If your yard has poor drainage or standing water, you may need to address grading issues. Low spots collect water and create constant moisture that kills Bermuda grass roots. Filling low spots with a sand and topsoil mix can improve drainage and eliminate chronic wet areas.
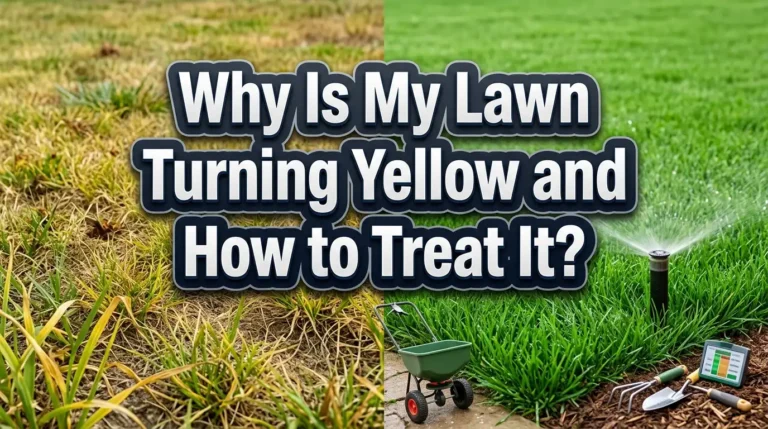
Overwatered Bermuda grass often appears yellow or pale green before turning brown. The soil may smell sour, and you might notice mushrooms growing in the lawn. These are all signs that your lawn is getting too much water. Cut back immediately and let the soil dry out between watering sessions.
How to Fix Brown Patches Caused by Drought Stress
Drought stressed Bermuda grass looks different from fungal damage. The entire lawn tends to lose its green color gradually, and the grass blades curl inward and turn a dull bluish gray before going brown. Footprints remain visible long after you walk across the lawn because the stressed grass cannot spring back.
Start by giving the lawn a deep soaking of about one to one and a half inches of water. Use a rain gauge or a tuna can placed in the sprinkler zone to measure output accurately. One deep watering is far more effective than several light sprinklings for drought recovery.
Water early in the morning between 5 AM and 10 AM. This gives the grass maximum time to absorb moisture before the afternoon heat causes evaporation. Evening watering keeps the grass wet overnight and promotes fungal growth, which would create a second problem on top of the drought stress.
Pros of deep watering for drought recovery: Bermuda grass recovers quickly from drought, often greening up within 7 to 14 days.
Cons of deep watering for drought recovery: Water costs increase temporarily, and overcompensating can lead to overwatering problems.
Raise your mowing height slightly during drought recovery. Taller grass blades shade the soil and reduce moisture loss. Once the lawn returns to full green, you can gradually lower the mowing height back to the recommended range of 1 to 1.5 inches for Bermuda grass.
Do not fertilize a drought stressed lawn. Fertilizer requires water to work, and applying it to dry, stressed grass can burn the roots. Wait until the grass is actively growing and green again before resuming your fertilization schedule.
How Soil Compaction Leads to Brown Patches and How to Fix It
Compacted soil is a hidden cause of brown patches that many homeowners miss. When soil particles are pressed tightly together, water and air cannot reach the roots. The grass slowly weakens and dies, creating brown patches that do not respond to watering or fertilizing.
Bermuda grass lawns built on clay soil are especially vulnerable to compaction. Heavy foot traffic, riding mowers, and even repeated rainfall can pack clay soil into a dense layer that roots cannot penetrate. If water puddles on your lawn after light rain, compaction is likely a contributing factor.
Core aeration is the best solution for compacted soil. A core aerator pulls small plugs of soil out of the ground, creating holes that allow air, water, and nutrients to reach the root zone. Aerate your Bermuda grass lawn in late spring or early summer when the grass is actively growing and can recover quickly.
Pros of core aeration: Immediately improves soil structure, promotes deeper root growth, and reduces thatch buildup.
Cons of core aeration: Requires renting or buying equipment, temporarily makes the lawn look messy, and needs to be repeated annually for best results.
After aerating, top dress the lawn with a thin layer of sand or compost. This fills the aeration holes with loose material that keeps the soil from compacting again. A quarter inch layer spread evenly across the lawn is enough. Water the top dressing in lightly to settle it into the holes.
You should see improvement within three to four weeks after aeration. The grass will begin spreading its runners into the damaged areas, and the brown patches will gradually fill in with new green growth.
How to Repair Brown Patches Caused by Grubs and Pests
Grub damage requires a two step approach: kill the grubs first, then repair the grass. Applying grass seed or plugs over an active grub infestation wastes your effort because the grubs will destroy the new growth just as they destroyed the old.
Apply a grub control product containing imidacloprid, chlorantraniliprole, or trichlorfon to the affected area. Water the product in with at least half an inch of irrigation to push it into the soil where grubs live. Preventive grub control works best when applied in early summer before eggs hatch.
For chinch bug damage, look for grass that turns yellow and then brown in sunny areas of the lawn. Chinch bugs prefer hot, dry spots and are most active in mid summer. Insecticidal soap or bifenthrin based products can control chinch bug populations effectively.
Pros of chemical grub and pest control: Fast acting and highly effective at stopping further damage.
Cons of chemical grub and pest control: Chemicals can affect beneficial insects, costs money, and may need repeat applications.
Once the pests are eliminated, help the grass fill back in by fertilizing with a balanced fertilizer and watering regularly. Bermuda grass spreads aggressively through stolons and rhizomes, so healthy surrounding grass will grow into the bare patches naturally.
For large bare areas that need faster recovery, cut Bermuda grass plugs from a healthy section of your lawn and plant them in the damaged spots about 6 to 12 inches apart. Keep the plugs watered consistently for the first two weeks. They will establish roots and begin spreading within three to four weeks.
How Mowing Mistakes Create Brown Patches
Improper mowing is a surprisingly common cause of brown patches in Bermuda grass. Cutting more than one third of the grass blade height at once shocks the plant and causes browning. This is called scalping, and it exposes the lower stems and soil to direct sunlight, which dries everything out.
Bermuda grass performs best when mowed to a height of 1 to 1.5 inches. If your grass has grown tall between mowings, lower the height gradually over two or three sessions rather than cutting it all at once. This gives the grass time to adjust without going into shock.
Dull mower blades tear the grass instead of cutting it cleanly. Torn grass tips turn brown and become entry points for fungal infections. Sharpen your mower blades at least twice during the growing season, or more often if you mow frequently.
Pros of proper mowing practices: Free, prevents multiple types of lawn problems, and promotes denser growth.
Cons of proper mowing practices: Requires more frequent mowing during peak growing season.
Mow your lawn when the grass is dry, not wet. Wet grass clumps together and creates uneven cuts. Those clumps also sit on the lawn surface and block sunlight, which causes the grass beneath them to yellow and die.
Avoid mowing in the same pattern every time. Alternating your mowing direction prevents the grass from developing a grain and distributes wear more evenly across the lawn. This simple habit reduces compaction in mower wheel tracks, which is a common but overlooked cause of linear brown patches.
How to Use Fertilizer to Speed Up Brown Patch Recovery
Fertilizer plays an important role in recovery, but timing and type matter more than quantity. Applying too much fertilizer or the wrong kind can actually worsen brown patches, especially if a fungal disease is active.
Wait until the active disease or stress condition is resolved before applying fertilizer. For fungal infections, this means waiting until the fungicide has stopped the spread and no new patches are forming. For drought stress, wait until the grass has rehydrated and begun turning green again.
Use a balanced slow release fertilizer with a nitrogen, phosphorus, and potassium ratio suited for Bermuda grass. A formula like 16-4-8 or similar works well for most Bermuda lawns. Slow release nitrogen feeds the grass steadily over several weeks without causing the rapid, soft growth that invites disease.
Pros of slow release fertilizer: Feeds the lawn steadily, reduces burn risk, and promotes strong root growth.
Cons of slow release fertilizer: Slower visible results compared to quick release options and slightly higher cost.
Apply fertilizer at a rate of about one pound of nitrogen per 1,000 square feet during the active growing season. Bermuda grass grows most actively from late spring through early fall, so this is the ideal window for fertilization.
After applying fertilizer, water the lawn lightly to wash the granules off the grass blades and into the soil. Leaving fertilizer sitting on wet grass blades can cause chemical burns that create new brown spots. A light 10 to 15 minute irrigation session immediately after application is sufficient.
How Thatch Buildup Contributes to Brown Patches
Thatch is a layer of dead grass stems, roots, and debris that accumulates between the green grass blades and the soil surface. A thin thatch layer of half an inch or less is actually beneficial because it insulates the soil and retains moisture.
However, Bermuda grass is a vigorous grower and can build up excessive thatch quickly. When thatch exceeds half an inch, it creates a barrier that blocks water, air, and fertilizer from reaching the soil. The roots begin growing into the thatch layer instead of the soil, making the grass vulnerable to drought and heat stress.
Excessive thatch also traps moisture against the grass crowns, creating a perfect environment for brown patch fungus to develop. If your lawn feels spongy when you walk on it, you likely have a thatch problem.
Dethatching with a power rake or vertical mower removes the excess layer and restores healthy soil contact. The best time to dethatch Bermuda grass is in late spring or early summer when the grass is growing fast enough to recover from the stress.
Pros of dethatching: Restores water and nutrient flow to roots, reduces disease risk, and improves fertilizer effectiveness.
Cons of dethatching: Temporarily damages the lawn’s appearance, requires equipment, and must be timed correctly to avoid harming the grass.
After dethatching, top dress with a thin layer of compost or sand and water thoroughly. The grass will look rough for one to two weeks but will fill back in quickly during the warm growing season. Combine dethatching with core aeration for the best long term results.
How to Prevent Brown Patches from Coming Back
Prevention is always easier and cheaper than treatment. Building a consistent lawn care routine is the single best defense against brown patches in Bermuda grass.
Water your lawn in the early morning and aim for about one inch per week. This schedule keeps the grass hydrated without leaving blades wet overnight. Adjust your watering based on rainfall so you do not overwater during rainy periods.
Mow regularly at the correct height of 1 to 1.5 inches and never remove more than one third of the blade length at once. Keep your mower blades sharp and alternate your mowing pattern each session.
Aerate your lawn once a year in late spring or early summer. This prevents soil compaction and keeps roots healthy. If your lawn gets heavy traffic, consider aerating twice per year.
Fertilize Bermuda grass three to four times during the growing season with a slow release balanced fertilizer. Avoid heavy nitrogen applications in late fall, which can promote brown patch fungus during the cooler months.
Monitor your lawn weekly for early signs of trouble. Catching a fungal outbreak or pest infestation early means faster treatment and less damage. Walk your lawn and look for changes in color, texture, or growth patterns.
Test your soil every two to three years to check pH levels and nutrient balance. Bermuda grass thrives in soil with a pH between 6.0 and 7.0. Lime raises pH in acidic soils, and sulfur lowers pH in alkaline soils. Balanced soil chemistry helps the grass resist disease and recover from stress faster.
When to Call a Professional for Brown Patch Problems
Most brown patch issues in Bermuda grass can be fixed with DIY methods. However, some situations require professional help to avoid wasting time and money on guesswork.
Call a lawn care professional if brown patches keep returning despite your best treatment efforts. Recurring fungal infections may indicate a deeper issue like poor drainage, chronic overwatering from an irrigation system problem, or a soil condition that needs specialized testing.
Large scale grub infestations covering more than 25% of your lawn may also benefit from professional treatment. Professionals have access to commercial grade products and application equipment that deliver more consistent results than consumer options.
If you are unsure what is causing the brown patches, a professional can take soil samples, inspect grass blades under magnification, and run diagnostic tests that give a definitive answer. This removes the guesswork and ensures you treat the actual problem.
Pros of professional lawn care: Accurate diagnosis, access to better products, and saves time.
Cons of professional lawn care: Higher cost and requires scheduling around the service provider’s availability.
Spring dead spot is one condition that almost always benefits from professional diagnosis. This disease attacks Bermuda grass roots during winter dormancy and shows up as dead circular patches in spring. It is difficult to treat with over the counter products and often requires a targeted fungicide program applied in the fall before dormancy begins.
Step by Step Quick Fix Plan for Brown Patches
If you want a simple action plan, follow these steps in order. Step one: Identify the cause by inspecting the grass blades, checking soil moisture, and performing the tug test for grubs.
Step two: Stop evening watering immediately and switch to early morning irrigation only. This single change can halt fungal spread within days.
Step three: If fungal disease is confirmed, apply a broad spectrum fungicide according to label directions. Repeat the application in 14 to 21 days.
Step four: If grubs or pests are the cause, apply the appropriate insecticide and water it into the soil.
Step five: Aerate compacted areas and top dress with compost or sand to improve soil structure.
Step six: Once the underlying problem is resolved, fertilize with a slow release balanced fertilizer to promote recovery. Water the fertilizer in lightly after application.
Step seven: Mow at the correct height with sharp blades and bag clippings from affected areas to prevent disease spread.
Step eight: Monitor the lawn weekly and repeat treatments if necessary. Most Bermuda grass lawns show significant improvement within two to four weeks when the correct problem is identified and treated.
Patience is essential during recovery. Bermuda grass is a tough, aggressive spreader. Given the right conditions, it will fill in bare patches on its own. Your job is to remove the stressor and give the grass what it needs to recover.
Frequently Asked Questions
Will brown Bermuda grass come back on its own?
Yes, in many cases Bermuda grass will recover on its own if the root system is still alive. Bermuda grass goes dormant during drought and cold weather, turning brown temporarily. Once conditions improve with rain or warmer temperatures, it typically greens up within one to two weeks. However, if the roots are dead from disease or pest damage, the grass will not return and will need reseeding or plugging.
How long does it take to fix brown patches in Bermuda grass?
Recovery time depends on the cause and severity of the damage. Minor fungal infections and drought stress can resolve in two to three weeks with proper treatment. Severe grub damage or dead root zones may take six to eight weeks or longer, especially if you need to replant the affected areas. Consistent watering, fertilizing, and mowing will speed up the process.
Can I use a garden hose to check for grubs?
Yes, the soapy water flush test works well. Mix two tablespoons of dish soap in a gallon of water and pour it over a brown patch area. Grubs and other insects will surface within 10 to 15 minutes if they are present. This is a safe, easy way to check for pest activity without digging up your lawn.
Should I water brown patches more than the rest of my lawn?
No, do not overwater brown patches. Applying extra water to a fungal infection will make it spread faster. If the patches are caused by drought, water the entire lawn evenly rather than focusing on specific spots. Consistent, deep watering across the whole lawn promotes uniform recovery and prevents new problems.
What is the best time of year to treat brown patches in Bermuda grass?
Late spring and early summer are the best times to address most brown patch problems. Bermuda grass is actively growing during this period and recovers fastest. Fungicide applications are most effective when started early in the disease cycle. Preventive grub control should go down in early summer before larvae hatch and begin feeding on roots.
Can overseeding fix brown patches in Bermuda grass?
Overseeding with Bermuda grass seed can help fill in large bare areas, but it is not always necessary. Bermuda grass spreads aggressively through underground rhizomes and aboveground stolons. If the surrounding grass is healthy, it will often fill in small to medium patches without any seeding. For large dead zones, planting grass plugs 6 to 12 inches apart is usually more reliable than seed.
Hi, I’m Jane! As a passionate gardener and product enthusiast, I spend my days testing garden tools, comparing products, and writing honest reviews so you don’t have to learn the hard way. Got a question? Feel free to reach out — I’d love to hear from you!