
How to Revive Dormant Grass Faster in the Spring?
Spring is here, your neighbor’s lawn is turning green, and yours still looks like straw. Sound familiar? You are not alone, and more importantly, your lawn is probably not dead. It is just dormant, and waking it up faster than ever is completely possible with the right steps.
Dormant grass is simply resting. The roots are alive underneath the soil, waiting for the right temperature, moisture, and care to push out fresh green blades again.
The problem is that most homeowners either wait too long, do the wrong things, or rush the process and end up causing more stress to the lawn.
This guide gives you a clear, step-by-step plan to revive dormant grass faster in the spring. You will learn exactly what your lawn needs, when to do it, and how to avoid the common mistakes that slow down recovery.
Key Takeaways
- Soil temperature is the most important trigger. Grass starts waking up when soil temperature consistently reaches 50 to 65 degrees Fahrenheit. Air temperature alone is not enough to signal recovery.
- Dormant grass is not dead grass. You can confirm this with a simple tug test. If the grass resists when you pull it, the roots are alive and recovery is possible.
- Deep, consistent watering is the fastest way to wake up a dormant lawn. Your lawn needs about 1 to 1.5 inches of water per week, delivered deeply rather than in frequent shallow sessions.
- Fertilizing too early causes more harm than good. Wait until at least 50 percent of the lawn shows visible green growth before applying any nitrogen-based fertilizer, or you risk burning weak, emerging roots.
- Aeration, dethatching, and overseeding work together. Removing the physical barriers that block sunlight, water, and nutrients from reaching the roots speeds up the recovery process significantly.
- Patience paired with consistent care wins every time. Most dormant lawns begin showing green growth within one to three weeks of proper spring care. Full recovery typically takes four to six weeks.
What Is Dormant Grass and Why Does It Happen?
Dormancy is a natural survival response in grass. When conditions become too cold, too dry, or too stressful, the grass shifts its energy away from blade growth and focuses entirely on keeping the roots alive. The surface turns brown or straw-colored, but the crown and root system below the soil remain functional and ready to grow again.
Grass goes dormant for several clear reasons. Cold winter temperatures are the most common cause in spring. When temperatures drop significantly, cool-season grasses like Kentucky bluegrass, tall fescue, and ryegrass slow their growth dramatically. Warm-season grasses such as Bermuda, zoysia, and St. Augustine go fully dormant and turn completely brown until the soil warms back up.
Drought is another major trigger. Without consistent moisture, the grass shuts down blade production to conserve the water it has left. Compacted soil, poor drainage, and low-quality soil nutrients can also contribute to prolonged dormancy because they prevent the roots from accessing what they need to restart growth.
Understanding why your grass went dormant helps you choose the right revival strategy. A lawn that went dormant because of cold temperatures needs warmth and early spring care. One that went dormant due to drought needs deep watering as the primary first step. Identifying the root cause saves time and prevents wasted effort.
How to Tell if Your Grass Is Dormant or Dead
Before investing time and energy into revival, you need to confirm that your grass is dormant and not dead. The difference matters because dormant grass can fully recover, while dead grass requires reseeding or resodding.
The most reliable method is the tug test. Grab a small section of brown grass and pull gently but firmly. If the grass resists and stays rooted in the soil, the crown and root system are still alive. That is dormant grass. If the grass pulls out with almost no resistance and the roots look dark, brittle, or mushy, that section is likely dead and will not recover on its own.
You can also examine the color and growth pattern. Dormant grass tends to turn uniformly brown or straw-colored across large sections of the lawn. Dead grass often appears in irregular patches, and the soil below it may feel dry, crusty, and lifeless. Dead areas often have no visible crown at the soil level.
Another sign to check is new growth near the base. Look closely at the very bottom of the brown blades near the soil. Dormant grass sometimes shows tiny hints of new green growth emerging from the crown, especially on warmer days. Dead grass shows no new growth at all.
If you confirm that certain patches are truly dead, you can treat those areas separately with overseeding while focusing your revival efforts on the dormant sections. Knowing which areas are recoverable helps you use your time and resources efficiently.
Check Soil Temperature Before You Start
One of the biggest mistakes homeowners make is starting spring lawn care too early. Grass does not respond to the calendar. It responds to soil temperature. Jumping in before conditions are right wastes your effort and can actually stress weak roots further.
Most cool-season grasses begin active growth when soil temperatures consistently reach around 50 degrees Fahrenheit. Warm-season grasses need warmer conditions, typically between 65 and 70 degrees Fahrenheit, before they truly come out of dormancy. Until those thresholds are met, the grass will not respond to fertilizer, overseeding, or even extra watering as quickly as it should.
You can check soil temperature with a simple soil thermometer. Push it about two to three inches into the ground in the morning before the sun has had a chance to warm the surface. Take readings in several spots around your yard, because shaded areas and north-facing sections tend to warm up several weeks later than sunny spots.
If your soil temperature has not yet reached 50 degrees Fahrenheit, the best action is to wait. You can use this time to test your soil, clean up winter debris, and prepare your tools. Acting at the right temperature window makes every other step you take far more effective.
Once soil temperatures are consistently in the right range and nighttime lows stop dropping below 40 degrees Fahrenheit, you are ready to start the active revival process.
Step 1: Remove Winter Debris and Dead Material
The first physical step in spring lawn revival is clearing the surface of everything that is blocking light, airflow, and warmth from reaching the soil. A thick layer of dead leaves, twigs, and matted grass clippings acts like a blanket that keeps the soil cold and the grass trapped in dormancy.
Start by raking the entire lawn with a firm leaf rake. Remove any dead leaves, fallen branches, and piles of debris that accumulated over winter. Pay special attention to areas near trees and fences where organic matter tends to pile up and stay wet.
Dead organic material also creates the perfect environment for fungal diseases and pests, both of which can damage your lawn just as it tries to recover. Getting rid of this layer removes the risk before it has a chance to spread.
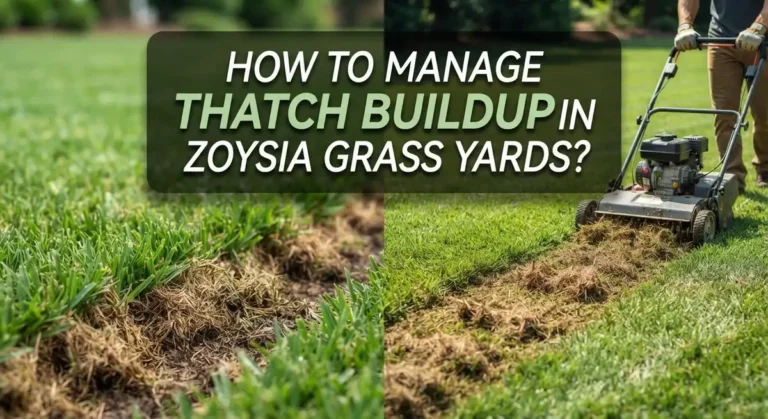
After the initial cleanup, take a closer look at the thatch layer. Thatch is a layer of interwoven dead grass stems, roots, and organic debris that builds up just above the soil surface. A thin thatch layer of about half an inch is harmless and actually helps retain moisture. Anything thicker than that acts as a barrier and significantly slows down spring green-up.
Use a stiff rake or dethatching rake to work through heavily thatched areas. You do not need to go deep. Just break up the surface mat so that light and water can reach the soil more easily. This single step alone can noticeably speed up dormancy recovery.
Step 2: Dethatch the Lawn Properly
Dethatching is one of the most effective ways to accelerate spring green-up. When thatch builds up beyond half an inch, it blocks water, air, and nutrients from reaching the roots. The grass essentially sits on top of a dry, compacted mat rather than having direct access to the soil below.
For most homeowners, a manual dethatching rake works perfectly for small to medium-sized lawns. You drag the rake across the lawn in firm, straight lines, pulling up the matted layer of dead material. For larger lawns, a power dethatcher or vertical mower can save significant time and effort.
The best time to dethatch in spring is just as the grass is beginning to wake up, but before it has fully leafed out. This timing allows the grass to recover and fill in the gaps created by dethatching as the growing season kicks in. Dethatching during full dormancy can be too disruptive to emerging root systems, so wait for that first hint of green before going all in.
After dethatching, collect and remove all the pulled-up material. Leaving it on the lawn creates a new layer of debris that defeats the entire purpose of the process. Once the surface is clean, your soil is exposed and ready to receive water and nutrients much more efficiently.
Dethatching also opens up the surface for overseeding, which makes it an ideal first step before adding new grass seed to thin or bare areas.
Step 3: Aerate the Soil to Improve Root Access
Soil compaction is a major reason why dormant grass stays brown longer than it should. When soil is tightly packed, water and oxygen cannot move freely through it, which means the grass roots are starved of what they need to restart growth.
Core aeration is the most effective solution. This process removes small plugs of soil from the lawn and creates channels for air, water, and nutrients to travel deep into the root zone. You can rent a core aerator from most hardware stores for a day and cover an average-sized lawn in a couple of hours.
For cool-season grasses, early spring aeration works well because the grass is about to enter its peak growing period and will recover quickly from the stress of aeration. For warm-season grasses, it is generally better to wait until the grass is actively growing before aerating, since these grasses recover more slowly when still waking up from dormancy.
After aeration, leave the soil plugs on the lawn surface. They will break down on their own within one to two weeks, returning nutrients to the soil. The open holes in the ground will act as direct pathways for water and fertilizer to reach the roots faster.
If you notice that certain areas of your lawn stay waterlogged or others dry out almost immediately, aeration is especially important for those spots. Both drainage problems and rapid drying are signs of compacted soil that is not absorbing water evenly.
Step 4: Test and Adjust Your Soil pH
Many homeowners water, fertilize, and aerate their lawns but still see slow, uneven green-up. Often, the culprit is the soil pH. If the pH is off, the grass simply cannot absorb the nutrients it needs, no matter how much fertilizer you apply.
Most lawn grasses prefer a slightly acidic soil with a pH between 6.0 and 7.0. The sweet spot for most species is around 6.5. When the pH falls below 6.0, the soil becomes too acidic, and nutrients like phosphorus and calcium become less available to the roots. When it rises above 7.0, the soil becomes alkaline and blocks the absorption of iron and manganese, which are essential for green color.
You can pick up a simple soil test kit at most garden centers. Take small soil samples from several spots around your lawn, mix them, and test the combined sample. The result will tell you whether you need to add lime to raise the pH or sulfur to lower it.
Lime acts relatively quickly in sandy soils but can take several months to fully adjust clay soils. Apply it at least a few weeks before your main fertilization to give it time to start working. Follow the product label instructions carefully, as adding too much lime too fast can overcorrect and create a new problem.
Correcting soil pH is one of the highest-impact steps you can take for spring revival because it unlocks the effectiveness of every other nutrient you add afterward.
Step 5: Water Deeply and Consistently
Watering is the single most powerful tool for reviving dormant grass, but the way you water matters just as much as how much you water. Most homeowners water too shallowly and too often, which encourages roots to stay near the surface rather than growing deep where they can access more moisture and nutrients.
A dormant lawn needs about 1 to 1.5 inches of water per week as it transitions out of dormancy in spring. The goal is to deliver this water in one or two deep sessions rather than daily light sprinkles. Deep watering encourages roots to grow downward, which builds a stronger, more drought-resistant lawn that will not slip back into dormancy as easily.
The best time to water is early in the morning, ideally between 5 a.m. and 10 a.m. Morning watering gives the blades time to dry before evening, which reduces the risk of fungal disease. Avoid watering in the evening, especially as temperatures are still cool in early spring, because wet grass sitting overnight in cool air is a recipe for lawn fungus.
To measure how much water you are applying, place a few empty tuna cans or shallow containers around your lawn while sprinklers run. When they collect about one inch of water, your lawn has had enough. This simple trick helps you calibrate your watering schedule accurately without guessing.
Gradually increase your watering frequency as temperatures rise and the grass begins actively growing. Be careful not to overwater, as soggy soil keeps the ground cool and can actually slow green-up rather than speed it up.
Step 6: Apply a Spring Fertilizer at the Right Time
Fertilizer can speed up spring green-up significantly, but the timing of application is everything. Fertilizing too early, while the grass is still fully dormant, puts nitrogen into the soil before the roots are ready to absorb it. This wastes your fertilizer and can even promote weed growth or burn shallow, emerging roots.
Wait until at least 50 percent of your lawn shows visible signs of green growth before applying fertilizer. This indicator tells you that the roots are actively growing and the grass is ready to use the nutrients you give it.
For spring revival, a balanced slow-release fertilizer with a nitrogen-phosphorus-potassium (NPK) ratio like 20-5-10 or similar works well for most lawn types. Nitrogen drives leaf and blade growth, phosphorus supports root development, and potassium improves the grass’s ability to handle stress and disease.
Apply the fertilizer in the morning on a day when no heavy rain is expected for at least 24 hours. Watering lightly after application helps the nutrients move into the soil. Avoid applying more than the recommended rate, as too much nitrogen too quickly produces a burst of blade growth that outpaces root growth, leaving the grass vulnerable.
For lawns that have been dormant for a full winter, one application in early spring and a follow-up four to six weeks later provides steady nutrition throughout the recovery and main growing season.
Step 7: Overseed Thin and Bare Patches
Even after your lawn fully recovers from dormancy, you may notice thin or bare spots that did not come back on their own. These areas need overseeding to fill in properly and prevent weeds from taking hold in the open soil.
Before spreading seed, lightly rake the bare area to loosen the top half-inch of soil. Grass seed needs direct contact with the soil to germinate properly. Seed that falls on top of compacted soil or thatch without reaching the soil surface will not germinate reliably.
Choose a seed variety that matches your existing grass type. Mixing incompatible grass species creates a lawn with uneven texture and color that is difficult to manage long-term. If you are unsure what type of grass you have, take a small sample to a local nursery or extension service for identification.
Spread the seed evenly at the rate recommended on the package. Too much seed creates overcrowding, which starves each seedling of light and nutrients. After spreading, lightly rake again to press the seed into the soil, then water the area gently. Keep overseeded areas consistently moist for the first two to three weeks, as drying out kills germinating seeds before they can establish.
New seedlings are delicate. Avoid mowing over freshly seeded areas until the new grass reaches at least three inches in height. This usually takes three to four weeks after germination.
Step 8: Mow Smart as the Grass Wakes Up
The first mow of the season is one of the most important, and one of the most commonly mishandled steps in spring lawn care. Mowing too early, too low, or too aggressively can shock grass that is just emerging from dormancy and set back recovery by weeks.
Wait until your lawn has greened up noticeably and the grass blades have reached about three to three and a half inches in height before you mow for the first time. This confirms that the grass is actively growing and strong enough to handle the stress of cutting.
Set your mower blade to a height that removes no more than one-third of the blade length in a single mow. This is called the one-third rule, and it is one of the most important guidelines in lawn care. Cutting more than one-third of the blade at once sends the grass into stress, which can push weakened, recovering grass back toward dormancy.
For cool-season grasses, a mowing height of 2.5 to 3.5 inches is ideal in spring. Taller grass shades the soil, reduces water evaporation, and helps suppress early-season weeds. For warm-season grasses like Bermuda or zoysia, a slightly lower height of 1 to 2.5 inches is appropriate, but only once the grass is fully active and growing vigorously.
Keep your mower blades sharp. Dull blades tear grass rather than cut it cleanly, leaving ragged edges that turn brown and create entry points for disease.
Step 9: Control Early-Season Weeds
Weeds are opportunists. They are often the first plants to green up in spring, and they take full advantage of a lawn that is still waking up and thin from winter. If you do not address early-season weeds, they can spread rapidly before your grass has a chance to fill in.
For the best results, apply a pre-emergent herbicide in early spring, before weed seeds germinate. This type of product creates a chemical barrier in the soil that prevents seeds from developing into seedlings. It does not affect existing plants, so it is safe to use on a dormant lawn that is beginning to wake up.
Important note: If you plan to overseed any areas of your lawn, do not apply pre-emergent herbicide in those spots. Pre-emergent products cannot tell the difference between weed seeds and grass seeds. They will prevent your new grass seed from germinating just as effectively as they stop weeds.
For weeds that have already sprouted, a targeted post-emergent herbicide is the better option. Spot-treat visible weeds rather than broadcasting herbicide across the entire lawn. This approach protects your recovering grass while still eliminating the competition.
Hand-pulling is also effective for small numbers of weeds, especially broadleaf weeds like dandelions, which have a deep taproot that responds well to manual removal in the loose, moist spring soil.
Step 10: Address Lawn Pests and Disease Early
Spring is a vulnerable time for lawns, and dormant or recovering grass is especially susceptible to pest damage and fungal disease. Identifying and treating these problems early prevents them from derailing your revival efforts.
Grubs are one of the most common spring lawn pests. These are the larvae of beetles that feed on grass roots just below the soil surface. Signs of grub damage include patches of grass that pull up easily from the soil with minimal root attachment and spongy, soft areas of turf. Grubs are usually most visible in spring when they move close to the surface before transforming into adult beetles.
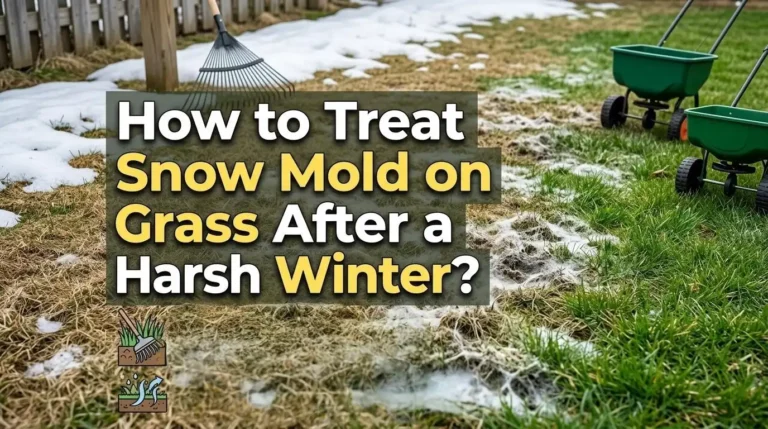
Fungal disease is another early-season concern. Cool, wet spring conditions create the ideal environment for diseases like snow mold, brown patch, and dollar spot. Snow mold often appears as circular patches of gray or pink matted grass as snow melts. If you notice these patterns, rake the affected areas to improve airflow and allow them to dry out before considering a fungicide treatment.
Avoid fertilizing an area that shows signs of disease, as extra nitrogen can fuel the fungus rather than the grass. Identify the problem first, treat it appropriately, and then resume your regular spring care routine once the disease is under control.
Step 11: Keep Foot Traffic Off the Recovering Lawn
This step sounds simple, but it is one that many homeowners overlook. Recovering grass is fragile. The new roots are shallow, the blades are tender, and the entire recovery process depends on the soil staying loose and aerated.
Heavy foot traffic compacts the soil, damages emerging blades, and disrupts the root zone just as new growth is establishing. Keep children, pets, and lawn furniture off the lawn as much as possible during the first four to six weeks of spring recovery. If you need to walk across the lawn, try to distribute traffic to different paths each time rather than always walking the same route.
If you have a lawn care routine that requires regular walking, consider using temporary stepping stones or planks to distribute your weight over a larger surface area. This simple trick reduces compaction significantly and protects the most vulnerable sections of your recovering lawn.
As the grass fills in and establishes deeper roots, it becomes much more tolerant of regular foot traffic. By late spring and early summer, a well-recovered lawn can handle normal use without any issue.
How Long Does It Take to Revive Dormant Grass?
One of the most common questions homeowners have is how long the revival process takes. The honest answer is that it depends on several factors, including your grass type, local climate, soil quality, and how consistently you follow through with care.
Most dormant lawns begin showing signs of green growth within one to three weeks of proper spring care. You will typically see small green patches appear first in sunny areas, followed by gradual coverage across the rest of the lawn. Do not be alarmed if shaded areas take an extra two to four weeks to catch up, as these spots receive less warmth and light and naturally wake up slower.
Full recovery, meaning a dense, evenly green, and fully healthy lawn, generally takes between four and eight weeks from the start of active spring care. Lawns that went into winter healthy, well-fertilized, and free of pest damage tend to recover the fastest. Lawns that were already stressed before winter, whether from drought, compaction, or disease, may take closer to eight weeks or even into early summer to fully fill back in.
The most important thing to remember is that consistency matters more than intensity. Doing the right things at the right time, week after week, produces far better results than trying to rush recovery with excessive watering or over-fertilizing. Treat your recovering lawn gently, give it what it needs, and it will reward you with strong, green growth that lasts through the entire growing season.
Frequently Asked Questions
How do I know if my dormant grass will come back?
The tug test is the most reliable way to check. Pull a small section of brown grass gently. If it resists and stays rooted firmly in the ground, the roots are alive and the grass will come back with proper care. If it pulls out with almost no resistance, that patch may be dead and will need reseeding.
What is the fastest way to make dormant grass green again in spring?
The fastest approach combines deep, consistent watering with early debris removal and dethatching. These steps together remove physical barriers and restore moisture to the roots simultaneously. Once you see about 50 percent of the lawn turning green, add a slow-release spring fertilizer to accelerate the process further.
Can I fertilize my lawn while it is still dormant?
You should avoid applying nitrogen-rich fertilizers to a fully dormant lawn. The grass cannot absorb the nutrients while it is in full dormancy, and the unused nitrogen can promote weeds or leach out of the soil before it does any good. Wait until at least half of the lawn is visibly greening up before applying fertilizer.
How much water does dormant grass need to wake up in spring?
Aim for 1 to 1.5 inches of water per week, including any rainfall. Deliver this water in one or two deep sessions rather than daily light watering. Deep watering encourages roots to grow downward, which speeds up recovery and creates a more drought-resistant lawn.
Should I mow my lawn before or after it comes out of dormancy?
You should wait until after the grass has clearly come out of dormancy and reached a height of about three inches before mowing. Mowing too early on still-dormant or very recently emerged grass can damage the crown and set back recovery significantly.
Why is my lawn greening up slower than my neighbor’s?
Several factors can cause this, including grass variety, shaded areas, lower soil temperature, thicker thatch, and soil compaction. Soil in shaded or north-facing areas warms up more slowly in spring. Running a soil temperature check, removing thatch, and aerating compacted areas are the most effective ways to speed up a slow lawn.
Is it too late to revive dormant grass if it is already late spring?
It is generally not too late if the grass is still showing signs of life through the tug test. Deep watering, light fertilization, and weed control can still produce a full recovery even in late spring. However, if summer heat arrives before your cool-season grass fully recovers, it may slip back into summer dormancy. For warm-season grasses, late spring is actually peak growing season and an ideal time for revival.

Hi, I’m Jane! As a passionate gardener and product enthusiast, I spend my days testing garden tools, comparing products, and writing honest reviews so you don’t have to learn the hard way. Got a question? Feel free to reach out — I’d love to hear from you!