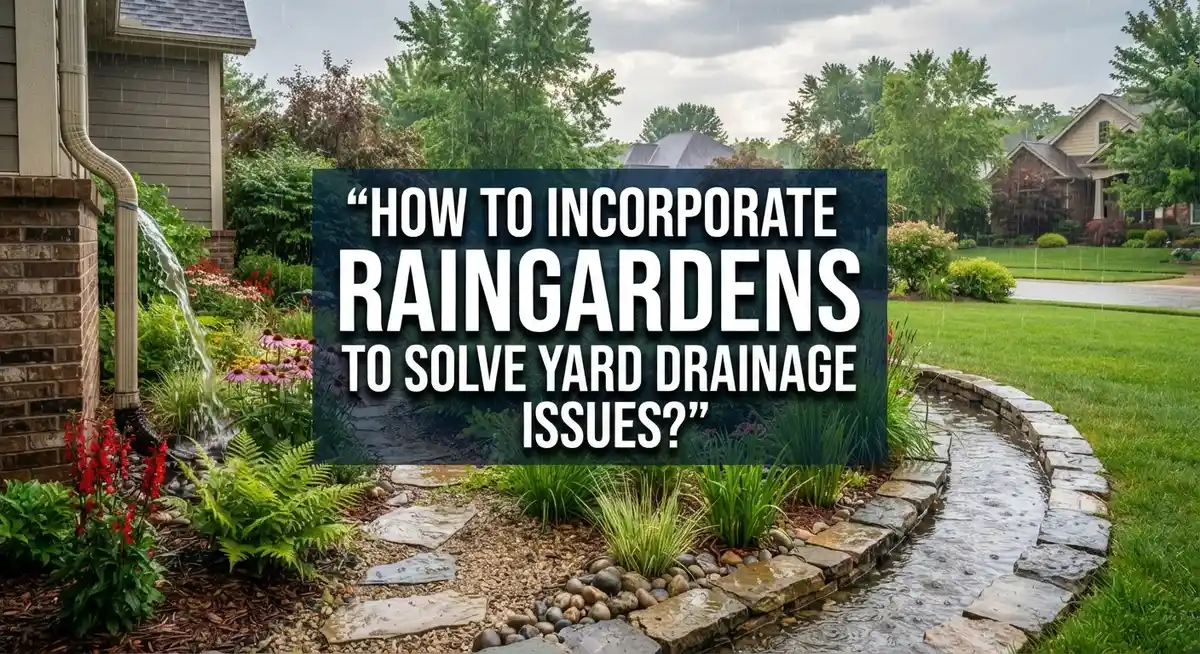
How to Incorporate Rain Gardens to Solve Yard Drainage Issues?
Does your yard turn into a swamp after every rainstorm? You are not alone. Many homeowners struggle with soggy lawns and pooling water.
The good news is you can fix this problem naturally. A rain garden is a shallow, planted dip in your yard. It catches runoff and lets it soak into the ground slowly.
This simple solution does more than stop puddles. It filters pollutants from stormwater before they reach local streams. It also gives thirsty plants a steady drink of water.
In this guide, we will show you how to solve yard drainage issues the smart way. You will learn how to pick the best spot and test your soil.
In a Nutshell
- Pick the right spot. Choose a low area in your yard. It should sit away from your home’s foundation.
- Test your soil first. This step tells you how fast water drains. It helps you plan the garden’s depth and size.
- Size it for the job. A garden that is too small will overflow. Match its capacity to the runoff it needs to handle.
- Layer it properly. Add gravel or rocks at the base. Top this with mulch and deep rooted plants.
- Choose plants by zone. Some plants love wet soil near the center. Others do better in drier soil at the edges.
- Let nature do the work. The soil and roots filter pollutants from the water. Your yard stays clean and dry.
What Is a Rain Garden and How Does It Work?
A rain garden is a shallow, planted depression that catches stormwater runoff right where it falls. Instead of letting water rush across your yard and pool in low spots, the garden captures it and lets the soil absorb it slowly.
Here’s how it works in practice. When rain falls on your roof, driveway, or lawn, water normally runs downhill and collects in problem areas. A rain garden sits in that path and stops the water before it becomes a puddle. The water soaks into the ground instead of sitting on top of it.
The magic happens underground. Layers of gravel, soil, and mulch work together to filter the water. As water moves through these layers, pollutants get trapped and broken down. Plant roots help speed up this process and keep the soil loose so water drains faster.
Your rain garden also reduces strain on your yard’s natural drainage system. Less water pools in one spot means less erosion and fewer muddy patches. The plants you add create a living filter that improves water quality while it soaks in.
The best part? A rain garden handles most rainfall events on its own. The water disappears into the ground within 24 to 48 hours. This prevents mosquito breeding and keeps your yard usable after storms.
Unlike French drains or swales, rain gardens don’t require trenches across your property. They sit in one location and do their job quietly. The plants grow, the soil filters water, and your drainage problem gets solved naturally. This approach costs far less than underground systems while being just as effective for typical yard drainage issues.
Signs Your Yard Needs a Rain Garden
Your yard sends clear signals when it needs help with water management. Puddles that stick around for hours or even days after rain are the first red flag. These standing pools show water isn’t draining fast enough into the soil.
Look for soggy patches that stay wet longer than the rest of your lawn. Grass in these areas often looks darker, feels mushy underfoot, or develops moss and algae growth. These damp zones create perfect conditions for mosquitoes and fungal problems.
Pay attention to erosion patterns in your yard. If you see channels where water rushes during storms or bare spots where grass won’t grow, water is flowing too fast across the surface. This runoff carries soil away and causes damage to your landscape.
Basement or foundation moisture is another serious sign. If water pools near your home’s base after rain, your yard isn’t absorbing runoff properly. This can lead to water seeping into crawl spaces or basements over time.
Watch for compacted soil areas. Heavy foot traffic, vehicles, or construction equipment compress soil and reduce its ability to absorb water. You’ll notice these spots stay wetter than surrounding areas.
Check for algae blooms in nearby ponds or green water in storm drains. This indicates excess nutrients from runoff are leaving your property. Your yard’s drainage system is overwhelmed and needs help.
Notice if certain plants struggle or die despite regular watering. Waterlogged roots can’t get oxygen, so plants suffer even when moisture seems abundant. This shows water isn’t moving through the soil properly.
These signs all point to the same solution: your yard needs better water management. A rain garden captures and filters this excess water right where it falls, solving these problems naturally.
Choosing the Best Location for Maximum Drainage Benefit
Finding the right spot makes all the difference in how well your rain garden works. You want to place it where water naturally flows during heavy rain. Walk your yard after a storm and watch where puddles form or where water runs. That’s your target zone.
The location should sit lower than the surrounding area. This natural slope helps water flow into your garden without extra effort. Avoid placing it directly against your house foundation. Water pooling near your home can cause basement moisture and structural damage.
Check that your chosen spot gets at least some sunlight. Most rain garden plants need several hours of light daily. Full shade areas don’t work well because plants struggle and water sits too long.
Make sure the location is at least 10 feet away from your septic system if you have one. You also want distance from underground utilities. Call your local utility locating service before you dig anywhere.
Consider accessibility for maintenance. Pick a spot you can reach easily with tools and supplies. You’ll need to remove debris and check plants seasonally.
Avoid areas where water pools year round or stays soggy constantly. These spots indicate poor drainage that needs different solutions. Your rain garden works best in areas with occasional flooding, not permanent wetness.
Test the soil at your chosen location before committing. Dig a small hole about 12 inches deep and fill it with water. Watch how fast it drains. Soil that absorbs water within 24 hours works perfectly for rain gardens. If water sits longer, that spot may need amendments or a different approach.
Testing Your Soil Before You Dig
Before you dig your rain garden, you need to understand what’s happening beneath the surface. Soil testing tells you whether your location will actually work for water absorption.
Start by checking soil texture. Grab a handful of moist soil from your chosen spot and squeeze it. Sandy soil crumbles apart easily. Clay soil holds together in a tight ball. Loamy soil (the best option) breaks apart with gentle pressure. Each type drains differently, and you need to know which one you have.
Perform a simple percolation test to measure drainage speed. Dig a small hole about 12 inches deep in your rain garden location. Fill it with water and let it drain completely. Fill it again and time how long the water takes to drain. Ideally, water should drain 1 to 2 inches per hour. Faster drainage means sandy soil. Slower drainage suggests clay or compacted earth.
Clay soil needs amendment. If your test shows poor drainage, you’ll need to add compost or sand to improve water movement. This is critical information before you design your garden size.
Check for soil compaction too. Compacted soil blocks water from soaking down. Use a metal rod or screwdriver to probe the ground. If you hit resistance within 12 inches, compaction is present. You may need to loosen or aerate this area.
Test at multiple spots across your chosen location. Soil varies even within small yards. One area might have clay while another has sand. This variation helps you understand water flow patterns and where to position your rain garden for best results.
Designing the Right Size and Capacity for Your Yard
A rain garden’s success depends on getting the size and capacity right for your specific yard. Start by calculating the area of your roof and any hard surfaces that drain toward your chosen location. This tells you how much water arrives during a typical rainstorm.
Most rain gardens work best when they cover about 5 to 10 percent of the drainage area they serve. If water from 1,000 square feet of roof flows to your garden, aim for a rain garden between 50 and 100 square feet. This size handles most common storms without overflow.
Next, measure the depth you’ll dig. Rain gardens typically range from 4 to 8 inches deep. Deeper gardens hold more water and give soil more time to absorb it. Shallower gardens work in areas with very sandy soil that drains quickly.
Consider your local rainfall patterns. Areas with heavy, frequent storms need larger gardens than drier regions. Check your average annual rainfall to guide your sizing decision.
Test your soil’s percolation rate again at this stage. Fast draining soil means you can go shallower. Slow draining soil requires greater depth and volume to let water soak in properly.
Don’t forget about overflow. Design a way for excess water to escape if your garden fills beyond capacity. A gentle slope leading water away from your foundation prevents problems during extreme storms.
Mark out your garden’s boundaries with spray paint or garden hose before digging. This helps you visualize the final size and make adjustments if needed. Getting dimensions right from the start saves time and ensures your rain garden performs as intended.
Step-by-Step: Digging, Layering, and Planting Your Rain Garden
Now that you’ve chosen your location, tested your soil, and designed your rain garden’s size, it’s time to get your hands dirty. The actual construction process follows a logical sequence that ensures water flows properly and plants thrive.
Start by marking your garden’s exact boundaries with spray paint or a garden hose. This gives you a clear visual guide as you dig. Begin excavating the depression, making sure the bottom is slightly uneven rather than perfectly flat. This prevents water from pooling in one spot.
Dig to your predetermined depth, typically between 4 to 8 inches depending on your soil type and local rainfall. The walls should slope gently inward, creating a basin shape. Remove any grass, weeds, or debris from the bottom.
Now comes the layering process. Start with a 2 to 3 inch layer of coarse gravel or rocks at the bottom. This creates space for water to collect and filter through. Above that, add a 2 to 3 inch layer of mulch. This helps retain moisture and prevents soil erosion.
The next layer is your amended soil mixture, about 4 to 6 inches deep. This should be rich garden soil mixed with compost. This layer is where the real filtration happens.
Finally, install a stone bed running from your garden’s entrance to its lowest point. These stones slow water flow as it enters, reducing erosion and allowing better absorption.
Plant your rain garden with species suited to both wet and dry conditions. Deep rooted plants work best because they access water stored deeper in the soil. Space plants according to their mature size to avoid overcrowding.
Selecting Plants for Wet and Dry Zones
Rain gardens have wet zones and dry zones. You need to pick plants that match each area. This ensures your garden thrives and drains properly.
Wet zones sit at the lowest point of your rain garden. These areas stay moist longer because water collects there first. Plants in wet zones must handle standing water and soggy soil. They need deep roots to access moisture during dry spells. Choose species that naturally grow in marshes, swamps, or along stream banks.
Dry zones are at the edges and upper sections of your rain garden. These areas dry out faster because water drains away quickly. Plants here need drought tolerance and strong root systems. They should survive periods with little moisture. Select species from prairie or upland habitats.
The transition between zones matters too. Plant a mix of species that handle moderate moisture in the middle areas. This creates a smooth gradient from wet to dry.
Native plants work best for both zones. They’re adapted to your local climate and rainfall patterns. They also attract pollinators and support local wildlife. Native species typically need less maintenance once established.
Consider bloom times when selecting plants. Choose varieties that flower at different times. This gives your rain garden color throughout the growing season.
Plant spacing is important. Space wet zone plants closer together since they grow in limited areas. Space dry zone plants farther apart to prevent overcrowding. Follow spacing guidelines for each species you select.
Water your newly planted rain garden regularly for the first few weeks. This helps roots establish before the garden receives runoff. Once plants mature, they’ll handle moisture naturally through your rain garden’s design.
Common Mistakes That Undermine Drainage Performance
Many people make critical mistakes when building rain gardens that prevent them from working as intended. Understanding these errors helps you avoid costly failures.
Poor location selection is the first major problem. Some homeowners place rain gardens too close to house foundations or septic systems. Water that pools near your home can cause structural damage. Others choose spots where water doesn’t naturally flow, making the garden useless. You need to observe where runoff actually travels during storms before you dig.
Skipping soil testing creates another common issue. Without knowing your soil’s percolation rate, you can’t predict how fast water will drain. Some people assume all soil drains equally, which is false. Clay soil drains slowly while sandy soil drains too fast. Testing reveals what amendments you need.
Undersizing your rain garden means it won’t handle the water volume your yard produces. A garden that’s too small will overflow during heavy rains, defeating its purpose. This happens when people don’t calculate their drainage area properly or ignore local rainfall patterns.
Ignoring water flow management causes problems too. Without a stone bed directing water from the entrance to the lowest point, water spreads unevenly. This creates muddy spots and reduces filtration effectiveness. The stone bed acts like a guide, slowing water speed and distributing it properly.
Planting the wrong species also undermines performance. Plants that can’t tolerate wet conditions will die in the low zones. Dead plants leave bare soil that erodes and clogs your garden. Choose species adapted to both wet and dry conditions for better results.
These mistakes are preventable with proper planning and attention to detail before you start digging.
Final Thoughts
Rain gardens offer a smart way to fix yard drainage problems. They capture water where it falls. This stops runoff before it becomes a bigger issue.
Your yard doesn’t need expensive drainage systems to stay dry. A well planned rain garden does the same job. It costs less and looks better too.
Success depends on three things. Location, soil testing, and proper sizing make or break your project. Skip these steps and your garden may fail.
Take time to plan before you dig. Watch how water moves through your yard first. Test your soil to understand drainage speed.
Size your garden based on real numbers. Calculate your roof and yard runoff correctly. This prevents overflow during heavy storms.
The digging and planting process is straightforward once you finish planning. Layer your soil, gravel, and mulch correctly. Choose plants suited to wet and dry zones.
Native plants work best in most cases. They handle local rainfall patterns naturally. They also need less care once established.
Your rain garden will need some upkeep. Weeding and mulching keep it healthy. Check plant health each season too.
Results won’t happen overnight though. Plants need time to establish deep roots. Full drainage benefits often take one to two growing seasons.
Patience pays off with this solution. A mature rain garden absorbs water efficiently. It also filters pollutants from your runoff.
Think of your rain garden as a long term investment. It solves drainage issues naturally. It adds beauty to your landscape too.
Start small if you feel unsure. Even a modest rain garden helps reduce standing water. You can always expand it later.
Your yard deserves a solution that works with nature. Rain gardens do exactly that.
Frequently Asked Questions
What exactly is a rain garden and how does it differ from a regular garden?
A rain garden is a shallow, planted depression that captures runoff water from your roof, driveway, and lawn. It works like a natural filter to absorb water right where it falls.
A regular garden just sits there. A rain garden actively collects and processes stormwater. The key difference is purpose and design. Rain gardens use deep rooted plants and special soil layers to filter pollutants while the water soaks in.
Can a rain garden actually replace my French drain or swale?
Yes, rain gardens serve as a cost effective alternative to French drains and swales. They handle the same job in a different way.
Instead of moving water away, rain gardens absorb it on site. This means less work and fewer materials. Both approaches reduce standing water in low spots. Rain gardens work especially well for homeowners who want a simpler solution.
How do I know if my yard is a good fit for a rain garden?
Start by observing where water pools after heavy rain. Those low spots are ideal locations for your rain garden.
You should also test your soil at the chosen site. Some soils drain too quickly or too slowly. Testing tells you if that spot will actually work. Poor location selection is the most common mistake people make, so take time to find the right area before digging.
What’s the minimum size my rain garden needs to be?
Size depends on how much runoff your yard produces. A larger roof or more impervious surfaces mean you need a bigger rain garden.
Work backwards from your roof and paved areas. Undersizing your garden means it won’t handle the water volume. This is why planning matters before you dig. Get the sizing right and your garden will perform as intended.

Hi, I’m Jane! As a passionate gardener and product enthusiast, I spend my days testing garden tools, comparing products, and writing honest reviews so you don’t have to learn the hard way. Got a question? Feel free to reach out — I’d love to hear from you!