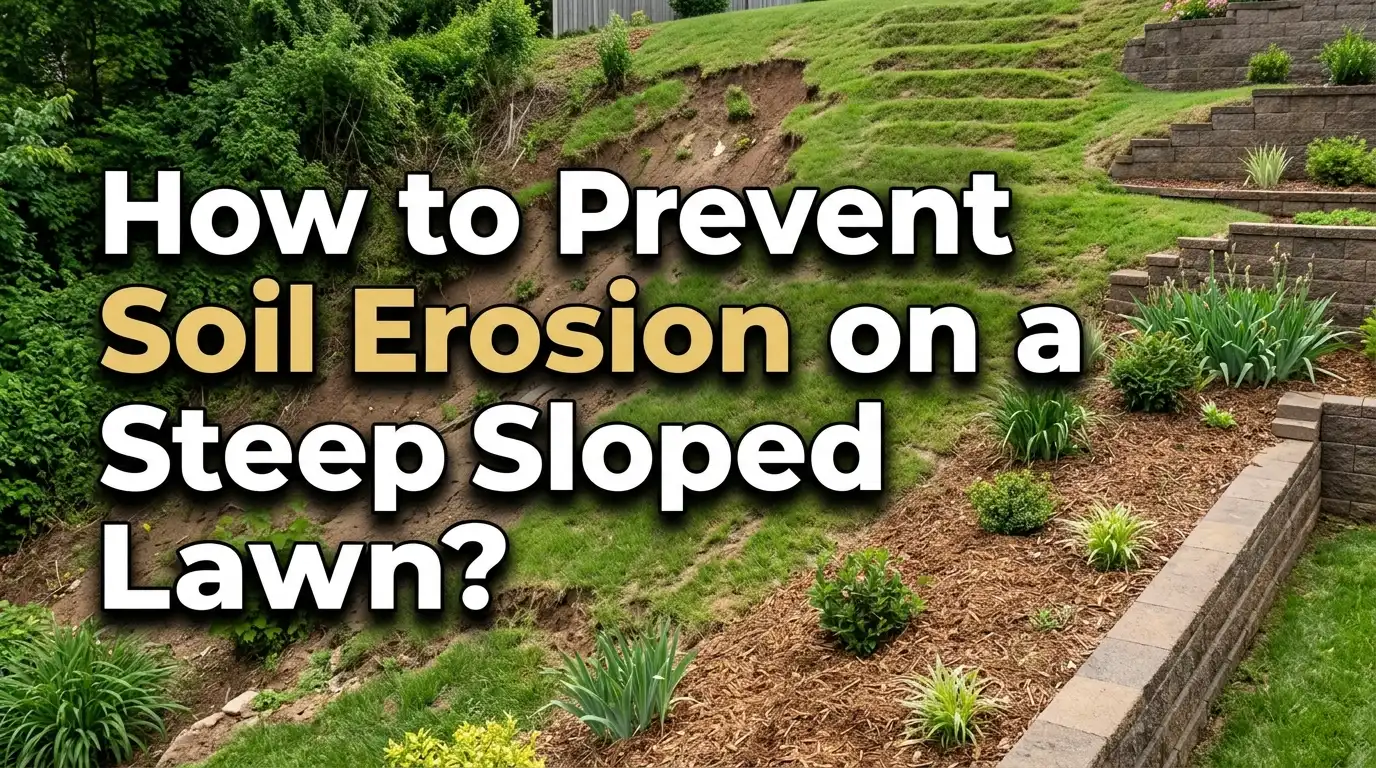
How to Prevent Soil Erosion on a Steep Sloped Lawn?
Does your lawn look like it’s slowly washing away after every rainstorm? If you have a steep sloped yard, you already know the frustration of watching your precious topsoil slide downhill, leaving behind bare patches, gullies, and a yard that looks worse every season.
Soil erosion on a slope is not just an eyesore. It is a real threat to your property, your foundation, and even your neighborhood’s water quality.
Here is a hard fact: the world loses approximately 500 million tons of soil every year due to erosion, and sloped lawns are among the biggest contributors. On a steep slope, gravity teams up with rain and wind to move soil faster than it can recover.
The good news? You can stop soil erosion on a steep lawn. There are proven, practical methods that homeowners use every day to stabilize their slopes, protect their soil, and actually transform a problem hillside into a beautiful, functional landscape.
Key Takeaways
- Soil erosion on steep slopes is a serious problem that can lead to property damage, mudslides, clogged drainage, loss of nutrients, and harm to local waterways, making it essential to act quickly and strategically.
- Vegetation is your first line of defense. Planting deep-rooted ground covers, shrubs, native grasses, and trees is one of the most cost-effective and long-lasting ways to hold soil in place on any slope.
- Physical structures like retaining walls and terraces are highly effective for slopes steeper than 50%, as they physically slow water flow, reduce runoff speed, and create stable planting beds that anchor the soil.
- Protective layers such as mulch, erosion control blankets, and geotextiles provide immediate soil protection, especially on bare or newly seeded slopes, while vegetation takes time to establish its root system.
- Proper drainage management is critical. Installing French drains, swales, or dry wells diverts excess water away from vulnerable areas before it builds up speed and washing power on your slope.
- A combination of methods always works better than one alone. The most successful slope stabilization plans layer plants, physical barriers, drainage solutions, and protective coverings together for maximum long-term results.
Understanding Why Steep Slopes Lose Soil So Fast
Before you can fix the problem, it helps to understand exactly why steep slopes erode so much faster than flat ground. When rain hits a sloped surface, water does not soak into the soil the way it does on level ground. Instead, gravity pulls the water downward at speed, and as it moves, it picks up soil particles and carries them along for the ride.
The steeper the slope, the faster the water moves, and the more soil it can carry. On a slope greater than 33%, this effect becomes noticeably destructive. On slopes above 50%, the erosion can be aggressive enough to cause visible gullies within a single heavy rain season.
Wind is another major contributor. Open hillsides that face prevailing winds lose dry topsoil particles constantly, especially in summer and fall when vegetation is sparse. Sun exposure also plays a role by drying out the surface layer of soil, making it loose, crumbly, and easy for the next rainstorm to sweep away.
Human activity makes things worse, too. Walking repeatedly across a slope, mowing at the wrong angle, or disturbing the soil for landscaping projects can break up the natural soil structure. Once that structure is disrupted, erosion accelerates quickly. Understanding these causes helps you choose the right combination of solutions that target the specific erosion drivers on your slope.
Assess Your Slope Before You Start
Taking time to assess your slope properly before doing anything else will save you time, money, and effort later. Not all steep slopes are the same, and the right erosion control method for your yard depends on several specific factors.
Start by measuring your slope’s gradient. You can do this simply by measuring the vertical rise over a horizontal run of 10 feet. A slope with a gradient below 33% is manageable with mulch and ground cover plants alone. Between 33% and 50%, you will need erosion control blankets, shrubs, and targeted drainage. Above 50%, you are looking at retaining walls, terracing, or riprap solutions.
Test your soil drainage by digging a hole roughly 12 inches deep, filling it with water, and checking back in one to two hours. If the water drains fully, your soil has good natural percolation. If water sits there for more than two days, you likely have dense clay or rocky subsoil beneath the surface, which means surface runoff will be your biggest problem.
Also note where bald spots are forming on your slope. Bare patches without vegetation are early warning signs of serious erosion. Look for small gullies or channels in the soil that trace where water flows during rain. These channels tell you exactly where your drainage is concentrated and where erosion is worst. Once you have this picture clear, you can prioritize your efforts and start with the areas at highest risk.
Plant Deep-Rooted Ground Covers to Hold the Soil
One of the most powerful and sustainable tools you have against slope erosion is plant roots. Roots physically thread through soil particles and bind them together. A dense network of roots from ground cover plants makes it extremely difficult for water to carry soil away, even during heavy rain.
The best ground cover plants for steep slopes are those with fibrous, spreading root systems that establish quickly and require little maintenance. Some excellent choices include creeping phlox, creeping thyme, vinca minor, pachysandra, blue rug juniper, and cotoneaster. For sunny slopes, lantana and daylilies are great options. For shaded slopes, hostas and pachysandra perform well.
Native plants are particularly valuable for erosion control because they are already adapted to your local climate, soil type, and rainfall patterns. This means they establish faster, require less watering, and are more likely to thrive long-term compared to non-native ornamentals. Native grasses like buffalo grass and fescue are especially effective because their fibrous root systems can reach deep into the soil and hold it with remarkable strength.
When planting on a steep slope, start at the top and work your way down. Use transplants rather than seed whenever possible, since seed tends to wash off slopes before it can germinate. Space plants according to their mature spread and mulch between them immediately after planting to protect the bare soil while roots establish. Within one to two growing seasons, a well-planted slope can become almost completely erosion-resistant through root coverage alone.
Use Mulch as an Immediate Protective Layer
Mulch is one of the fastest and most affordable erosion control tools available to any homeowner. It works by creating a physical barrier between the soil surface and the forces of rain and wind, absorbing the energy of raindrops before they can displace soil particles.
A layer of mulch at least 2 to 3 inches deep is generally sufficient to protect the soil on a gentle to moderate slope. On steeper slopes, you can go up to 4 inches, but thicker layers risk sliding downhill if not properly secured. Organic mulches like shredded bark, wood chips, and pine needles work best because they interlock with each other and grip the slope better than fine or smooth materials.
Research shows that straw mulch and wood-based mulch are significantly more effective at reducing runoff and soil loss than rock fragments. Organic mulch also breaks down over time, enriching the soil with nutrients that support stronger plant growth. This creates a positive feedback loop: better soil leads to stronger plants, and stronger plants lead to better erosion control.
To keep mulch from sliding on a steep slope, install small wooden stakes or biodegradable erosion control netting over the top. You can also use natural log rolls or wattle barriers placed horizontally across the slope at regular intervals. These barriers catch mulch and soil as they move downhill, creating a series of mini-terraces that steadily build up soil depth over time. Reapply mulch once a year in spring to maintain an effective protective layer throughout the growing season.
Install Erosion Control Blankets and Geotextiles
When a slope is bare, recently seeded, or has soil too thin to support immediate plant growth, erosion control blankets and geotextiles provide critical short-term protection. These materials cover the soil surface and hold everything in place while vegetation has time to establish its root system.
Erosion control blankets are typically made from biodegradable natural materials like straw, coconut fiber (coir), jute, or a blend of these materials. Coir blankets are especially popular for steeper slopes because coconut fiber is naturally longer-lasting than straw, resisting breakdown for one to three years before decomposing into the soil. Straw blankets are better for gentle slopes and shorter-term applications.
Geotextiles are the synthetic option, made from woven or non-woven polypropylene materials that provide durable, long-lasting soil stabilization. For very steep slopes or areas with concentrated high-velocity water flow, you may need turf reinforcement mats (TRMs), which are a heavier-duty version of erosion control blankets designed to permanently reinforce vegetation once it grows through the mat.
Installing erosion control blankets correctly is simple but important. Lay the blanket from the top of the slope downward, overlapping each section by at least 6 inches. Secure the blanket with biodegradable staples or wooden pins at the top, down the sides, and across any overlapping seams. If you are seeding underneath, seed first, then apply the blanket on top. The blanket will hold the seed in place, retain moisture, and protect the soil until grass or ground cover plants can take over.
Build Terraces to Break Up the Slope
Terracing is one of the most effective long-term strategies for managing steep slopes. Research confirms that terracing can reduce surface runoff by over 41.9% and soil loss by more than 52%, making it one of the highest-impact erosion control methods available.
A terrace is essentially a flat or gently sloped platform cut into the hillside, creating a series of stair-stepped levels. Each terrace level slows water flow, gives it time to infiltrate into the soil, and provides a stable planting bed for vegetation. Instead of rushing straight down the hill, water moves step by step, losing energy and speed at each level.
You can build terraces using a variety of materials, including natural stone, timber, concrete blocks, or even just compacted soil and logs. For a more natural look, stacked fieldstone terraces blend beautifully into a landscape. For a more modern or formal look, concrete block or segmental retaining wall blocks create clean, precise lines.
The height of each terrace level should not exceed what the material can safely retain. Timber or log walls are generally safe up to about 3 feet. Stone and concrete block walls can be taller but may require professional engineering for walls above 4 feet.
Each terrace should slope very slightly backward (toward the hill) to encourage water infiltration rather than runoff. Plant each terrace level with deep-rooted vegetation immediately after construction to prevent erosion within the terrace itself while the structure settles and establishes.
Build Retaining Walls for Maximum Structural Support
A retaining wall is the most structurally intensive erosion control solution, and for very steep slopes, it is often the most necessary. A well-built retaining wall holds back large volumes of soil, prevents slope failure, and can completely transform a challenging hillside into a beautiful, usable yard.
Retaining walls work by transferring the lateral pressure of the soil behind them down into their foundation and base. This keeps the soil from sliding, even during heavy rain or after the ground becomes saturated with water. Materials commonly used for retaining walls include natural stone, concrete blocks, timber, gabion baskets (wire cages filled with rocks), and poured concrete.
Gabion basket walls deserve special mention because they are more affordable than poured concrete or engineered block walls, and they offer built-in drainage since water flows freely through the rock fill. This prevents the dangerous buildup of hydrostatic pressure that can cause solid walls to crack or lean over time. They also look very natural and integrate well into a landscape.
Drainage behind a retaining wall is critical. Every retaining wall needs a gravel backfill layer and either weep holes or a perforated drainage pipe installed at the base of the wall. Without proper drainage, water pressure builds up behind the wall and can push it over, especially after a heavy rainstorm. For walls taller than 4 feet or on slopes above 50%, always consult a structural engineer or licensed landscaping contractor to ensure the wall is designed and built to code.
Plant Trees and Shrubs for Deep Root Stabilization
While ground cover plants protect the top few inches of soil, trees and shrubs provide something that ground covers cannot: deep root stabilization. The root systems of trees and large shrubs can penetrate 3 to 10 feet or more into the soil, anchoring the deeper layers of the slope that shallow-rooted plants simply cannot reach.
Trees and shrubs also intercept rainfall at the canopy level, breaking the force of rain before it ever reaches the soil. This interception effect significantly reduces the erosive impact of heavy rainfall on the slope below. A single mature tree can intercept thousands of gallons of rainwater per year through its leaves alone, dramatically reducing the amount of runoff that hits the soil surface.
For steep slopes, choose shrubs and trees with naturally spreading, fibrous root systems rather than tap-rooted varieties. Good shrub options include forsythia, native sumac, rugosa rose, and ornamental grasses like switchgrass or muhly grass.
For trees, consider serviceberry, native dogwood, or redbud, which have relatively shallow spreading roots ideal for slope stabilization. Avoid trees with very large tap roots on slopes where the soil is thin, as they may not establish strongly enough to provide real stabilization.
Plant trees and shrubs in staggered rows across the slope rather than straight lines. Staggered planting patterns create a more continuous root network and break up the channels that water naturally forms on a slope. Mulch generously around each plant after installation to protect roots and retain moisture during the critical first two years of establishment.
Create Swales and Water Diversion Channels
Water management is just as important as soil stabilization on a steep slope. If you can redirect or slow down water before it builds speed and erosive power, you dramatically reduce the amount of soil it carries away. Swales and diversion channels are the primary tools for this job.
A swale is a shallow, vegetated channel or depression that runs across the slope, perpendicular to the direction of water flow. Swales capture runoff, slow it down, and allow it to soak into the soil rather than racing downhill. They are especially effective when planted with dense, deep-rooted vegetation that further slows the water and filters sediment from the flow.
Diversion channels are more structured than swales and are typically lined with rock, gravel, or concrete to handle larger volumes of water at higher speeds. These channels guide water from a steep area to a safer outlet, such as a rain garden, dry creek bed, or municipal storm drain. Properly designed diversion channels eliminate the concentrated flow that causes the worst gully erosion on steep slopes.
To build a basic swale, mark a line across your slope at the desired location and excavate a shallow, gentle V-shaped or curved channel about 6 to 12 inches deep and 12 to 24 inches wide. Backfill with gravel and topsoil, then seed or plant the swale with moisture-tolerant native grasses or plants. For steeper slopes or areas with heavy rainfall, consider lining the channel with river rock or flagstones to prevent the swale itself from eroding during peak flow events.
Install a French Drain for Subsurface Water Management
When surface swales are not enough, a French drain addresses erosion at a deeper level by intercepting groundwater and subsurface moisture before it saturates the slope and triggers runoff. A saturated slope is far more vulnerable to erosion and even mass slope failure than a well-drained one.
A French drain consists of a perforated pipe wrapped in filter fabric, buried in a gravel-filled trench. Water seeps into the gravel, enters the perforated pipe, and is channeled away from the saturated area to a safe discharge point like a dry well, rain garden, or street-level drain. This prevents the dangerous moisture buildup that causes soil to lose its cohesion and slide.
French drains are particularly effective on slopes where clay-heavy soils limit natural infiltration, causing water to pool near the surface and run off rapidly. Clay soils hold water well but do not drain it quickly, making them highly vulnerable to erosion during prolonged or heavy rain events. Installing a French drain behind or along the base of a retaining wall is also essential for preventing hydrostatic pressure buildup that can destroy the wall over time.
Installing a French drain is a moderate DIY project for most homeowners. Dig a trench at least 12 inches wide and 18 inches deep along the line where you want to intercept water flow. Line the trench with landscape fabric, add 4 inches of gravel, lay your perforated pipe with holes facing down, cover with more gravel, fold the fabric over the top, and backfill with soil. The outlet end of the pipe should discharge at a point lower than the intake, using gravity to move water naturally through the system.
Use Riprap for High-Flow and Heavily Eroded Areas
In areas where water flows with concentrated force, such as at the base of a slope, along drainage channels, or at downspout discharge points, riprap is a highly effective erosion control solution. Riprap uses large, angular stones to absorb and dissipate the energy of fast-moving water before it can dig into the soil below.
Riprap works because angular rocks interlock with each other, creating a stable armored surface that water flows over rather than through. Unlike smooth river rocks, which can roll and shift, angular riprap stays in place even under high water velocity. The stone’s mass and interlocking structure absorb kinetic energy from the water, slowing it down and preventing scour erosion at the soil surface below.
Standard riprap stone sizes for residential slopes range from 4 inches to 12 inches in diameter, with larger stones used in areas with higher water velocity or steeper grades. Always install a layer of geotextile filter fabric beneath the riprap to prevent fine soil particles from migrating up through the stone layer and washing away.
Without this filter fabric, the soil beneath will eventually erode even with riprap on top, causing the stones to sink and the protection to fail.
Riprap is especially useful at the base of retaining walls, along downhill edges of terraces, at drainage pipe outlets, and along any channel where concentrated runoff regularly flows. It is a low-maintenance solution once installed correctly and can last for decades without significant intervention. Pair riprap with plantings around its edges to soften its appearance and provide additional root stabilization to the surrounding soil.
Apply Drip Irrigation Instead of Sprinklers
One often overlooked contributor to slope erosion is the irrigation system itself. Traditional overhead sprinklers apply water in large volumes at once, and on a steep slope, much of that water runs off before it can soak in. This runoff adds to natural rainfall-driven erosion and can create its own erosion channels over time.
Switching from sprinkler irrigation to drip irrigation is a simple but powerful step that directly reduces slope erosion from irrigation activity. Drip irrigation delivers water slowly and directly to the root zone of each plant, allowing the soil to absorb it at a controlled rate. This eliminates the surface runoff that overhead watering causes on slopes and ensures that every drop of water goes exactly where it is needed.
Drip irrigation also promotes deeper root growth, because plants send roots downward to follow the water deeper into the soil. Deeper roots mean stronger erosion resistance, which creates a long-term benefit far beyond just the irrigation itself. On slopes with established plants, a properly installed drip system can virtually eliminate irrigation-driven erosion while simultaneously reducing your water bill by 30 to 50 percent compared to overhead watering.
Install drip irrigation lines along the contour of your slope, with emitters placed at the base of each plant. Use pressure-compensating emitters on slopes to ensure equal water distribution regardless of elevation changes. Run the system for longer, less frequent intervals to encourage deep water penetration rather than surface saturation. Cover all drip lines with mulch to protect them from UV damage and freeze-thaw cycles, and check emitters at least once a season to clear any blockages.
Use Erosion Control Wattles and Log Rolls
Erosion control wattles, sometimes called fiber rolls or straw wattles, are simple but surprisingly effective tools for slowing water on steep slopes and catching sediment before it travels far. They are essentially long tubes filled with straw, compost, wood fibers, or coir, staked across the slope at regular intervals.
Wattles work by acting as small check dams that interrupt the flow of water and sediment running downhill. As water hits a wattle, it slows down and pools slightly on the uphill side, allowing suspended soil particles to settle out. Over time, sediment builds up on the uphill side of each wattle, gradually creating small, natural terraces that further stabilize the slope.
Wattles are particularly useful as an immediate, temporary erosion control measure while you wait for permanent plantings to establish. They are biodegradable, easy to install without heavy equipment, and relatively affordable compared to engineered solutions. Once the vegetation on your slope is fully established, the wattles will have decomposed and added organic matter to the soil, leaving behind a naturally stabilized landscape.
To install erosion control wattles, space them across the slope at intervals determined by the steepness of the grade. On a 2:1 slope, place wattles every 5 to 10 feet vertically. On gentler slopes, you can space them further apart. Stake each wattle firmly into the ground at a slight angle leaning into the slope to prevent water from flowing underneath. Overlap the ends of adjacent wattles by at least 3 inches to prevent gaps that water can exploit, and always install wattles along the contour of the slope, not up and down the slope.
Reduce Soil Compaction and Limit Foot Traffic
Compacted soil is far more vulnerable to erosion than healthy, porous soil. When soil becomes compacted, its pore structure collapses, reducing its ability to absorb water. Instead of infiltrating, rainwater sits on the surface and runs off, taking soil particles with it. On a steep slope, this effect is dramatically amplified.
The main cause of soil compaction on residential slopes is repeated foot traffic and mowing. Every time someone walks, rides a mower, or drives equipment across a slope, the soil structure compresses under that weight. Over time, even gentle foot traffic creates hard, impermeable soil that sheds water like pavement.
Protect your slope by establishing clear pathways with stepping stones, gravel paths, or landscape timbers so that foot traffic is concentrated in specific areas rather than spread randomly across the slope. Keep heavy equipment like lawn tractors and wheelbarrows off the slope whenever possible. If you need to mow a grassy slope, use a lightweight push mower and vary your mowing direction each time to avoid creating permanent compaction tracks.
For slopes that are already compacted, aerating the soil is an important first step before any planting or other erosion control work. Core aeration physically removes small plugs of soil, opening up channels for water to infiltrate. You can rent a manual or power core aerator for this purpose. Follow aeration with an application of compost, which helps rebuild the organic matter content of the soil and restores the porous structure that allows it to absorb water effectively.
Use Rock Gardens and Dry Creek Beds as Functional Features
For homeowners who want their erosion control to do double duty as a landscape feature, rock gardens and dry creek beds are an excellent choice. These features are both beautiful and highly functional, and they manage water flow and soil stability while adding real aesthetic value to a sloped yard.
A dry creek bed is a shallow channel lined with gravel and river rocks that mimics a natural streambed. It acts as a drainage path for runoff, guiding water down and across the slope in a controlled direction without scouring the soil as it travels. Unlike a hard concrete channel, a dry creek bed allows some water to percolate through the gravel into the soil below, which improves water infiltration and reduces total runoff volume.
Rock gardens use a combination of stones and drought-tolerant plants to stabilize areas where traditional lawn grass struggles to grow. On a steep south-facing slope that bakes in the summer sun, a rock garden planted with sedums, ornamental grasses, lavender, and native wildflowers can be far more effective and attractive than a patchy lawn that erodes every spring. The rocks hold the soil and create microclimates where plants can establish and thrive.
To build a dry creek bed, mark the path of your drainage channel, excavate 4 to 6 inches deep, line with geotextile fabric, and fill with a mix of gravel and larger river rocks. Vary the rock sizes to create a natural look and place the largest rocks at the outside curves of the channel where water velocity is highest. Plant moisture-tolerant native species along the edges of the creek bed to further stabilize the banks and add visual interest throughout the year.
Frequently Asked Questions
What is the fastest way to stop soil erosion on a steep slope?
The fastest short-term solution is to cover bare soil immediately with erosion control blankets or straw mulch. These can be installed in a single afternoon and will stop active erosion right away. For a longer-term fix, planting fast-spreading ground cover plants alongside mulch gives you both immediate and permanent protection. Combining an erosion control blanket with seeding underneath is one of the most effective quick-start approaches available to homeowners.
What plants are best for preventing erosion on a steep hillside?
The best plants for steep slope erosion control are those with deep, fibrous, or spreading root systems that establish quickly. Excellent choices include creeping phlox, vinca minor, native bunch grasses, daylilies, forsythia, creeping juniper, and low-growing sumac. Native plants are always the top recommendation because they adapt easily to local conditions and require minimal maintenance once established. For very steep slopes, combine ground covers with shrubs and small trees to create multiple layers of root stabilization at different soil depths.
How do retaining walls help prevent soil erosion?
Retaining walls physically hold back the mass of soil on a slope, preventing it from sliding downward under the weight of gravity and water saturation. They create flat areas on a slope where plants can establish more easily, and they interrupt the flow of water, reducing its speed and erosive force. Proper drainage behind a retaining wall (using gravel backfill and weep holes) is essential to prevent water pressure from building up and destabilizing the wall itself.
Can I prevent slope erosion without spending a lot of money?
Yes, absolutely. Mulching, planting native ground covers, installing erosion control wattles, and seeding with native grasses are all highly effective and very affordable options. Many of these solutions can be done as weekend DIY projects with minimal tools and materials. Straw mulch and erosion control blankets are among the least expensive materials you can buy, and they work very well on moderate slopes. Combining inexpensive solutions strategically often produces better results than relying on one expensive solution alone.
How does drainage affect soil erosion on slopes?
Poor drainage is one of the biggest drivers of slope erosion. When water cannot infiltrate the soil quickly enough, it runs off on the surface, picking up and carrying soil particles downhill. Installing French drains, swales, or dry creek beds redirects this water before it builds speed and cutting force. Even simple improvements like adding organic matter to improve soil structure can dramatically increase water infiltration rates and reduce the amount of surface runoff that causes erosion on your slope.
When should I hire a professional for slope erosion control?
You should hire a professional when your slope is steeper than 50%, when you need a retaining wall taller than 3 to 4 feet, when there are signs of slope instability or mass movement (deep cracks, sudden soil shifts, bulging), or when the erosion is threatening a structure like your home’s foundation, a driveway, or a neighboring property. A licensed landscaper or geotechnical engineer can assess the full extent of the problem and design a solution that meets local building codes and safely addresses the risk. For moderate slopes with mainly surface erosion, most homeowners can handle the work themselves using the methods described in this guide.
How long does it take for erosion control plants to work?
Most erosion control ground covers take one full growing season (roughly 3 to 6 months) to establish enough root coverage to provide meaningful protection. Fast-spreading plants like creeping phlox and vinca minor can show significant coverage within a single summer. Trees and shrubs take longer to develop their full root systems, usually 2 to 3 years, before they contribute maximum stabilization. During the establishment period, always use mulch or erosion control blankets to protect the soil while plants are still growing in.

Hi, I’m Jane! As a passionate gardener and product enthusiast, I spend my days testing garden tools, comparing products, and writing honest reviews so you don’t have to learn the hard way. Got a question? Feel free to reach out — I’d love to hear from you!